 Skip to recipe!
Skip to recipe with pictures!
Sorry my post is a day late; yesterday involved icy roads and car shopping (by coincidence, I assure you), but things are on track now!
When I think of these pretzels, I think of my friend Ginny. I don’t think I’ve mentioned her on this blog before, which is a shame, because she’s a great friend with a fascinating story: She’s among the many celiacs who get a false negative on the antibody test, but a positive genetic test. Long story short, when we met her she knew something was wrong with her, but had no idea what–and neither did any of her doctors. (We’ve all been there, haven’t we?) But the better my sister and I got to know Ginny, the more she would mention some of her symptoms, or we would mention some of ours, and we’d all start to get a little wigged out at how much we had in common. She had clear signs of malabsorption problems, as well as arthritis and a few other physical symptoms in common with my sister, so we started advising her to get tested for celiac. Everybody was pretty sure she had it, but never as sure as a few weeks into her gluten-free diet, when she got some sort of skin reaction on her arms that she figured out was from flour touching her skin in the kitchen at work!
In any case, once she realized she was really going on a gluten-free diet, she made two requests: That I make a dough that could be fried well (I’m working on it!), and that I make soft pretzels. Well, Ginny, here you go!
I know traditionally you brush pretzels with oil before baking, but with these pretzels it just made them soggy; they came out better dry. I normally only make 8 at a time, but since that means working with amounts of xanthan gum measured in sixteenths of a teaspoon, I doubled it–xanthan gum isn’t something you want to be estimating, exactly, if you don’t happen to have a 1/16th teaspoon measure. (They do exist, of course, and I recommend Pourfect’s.) In any case, they’re a great snack, and not as much work as they seem like; yes, you have to put the dough through a baking soda bath before baking it, but if you time that right it doesn’t really take very long. You could probably make a traditional pretzel shape if you worked at it hard enough, but I personally found it too much hassle to be worth it with such a soft dough, and with the need (as usual for gluten-free dough) to shape the dough before letting it rise, then being careful not to re-shape it later. Braver souls than I may succeed where I’ve failed, though!
Yield: 16 pretzels
Ingredients:
- 2 1/2 cups dough mix
- 3/8 tsp xanthan gum
- 1 tsp salt
- 5 tsp sugar, divided
- 1 cup warm water
- 2 packages (1 1/2 T) active dry yeast
- water and baking soda for soda bath
- 2-4 T melted butter for brushing
- sea salt and whatever other toppings you like for pretzels!
Directions:
- In small bowl, dissolve 2 tsp of the sugar and the yeast into the warm water, and set it aside to proof for at least 5 minutes.
- Meanwhile, in your stand mixer or other big mixing bowl, combine the dough mix, xanthan gum, salt, and remaining 1 T sugar, and mix thoroughly.
- Add the yeast mixture to the dry ingredients, and mix till it comes together. The dough shouldn’t be stiff at all; in fact, it should be light and squishy enough that you’ll want to pinch it out instead of trying to roll it between your hands, but stiff enough that you can in fact pinch it out into a shape! But I’m getting ahead of myself.
- Lightly dust a countertop or other surface with dough mix, then cut the dough into 16 roughly equal pieces. Take each piece and gently shape it into a stick about 5-6″ long.
- Space the sticks out by a few inches so they have room to rise, then let them proof 30 minutes to an hour, or until they’ve increased in size by at least a third.
- Ten or fifteen minutes before the dough’s finished rising, you’ll want to start your oven preheating to 375 degrees, put out a cookie sheet or two lined with parchment paper, AND start a pot of water boiling on the stove. You’ll need a pot big enough for one or two of the dough sticks to fit comfortably inside, but no larger. Once the water starts boiling, and the dough’s about done rising, carefully add a few spoonfuls of baking soda to the boiling water. It’ll churn and boil harder, then calm down.
- Now, it’s time to give the pretzel dough a baking soda bath. This is what gives pretzels their distinctive pretzel-ish taste! Using a slotted spatula, carefully put one of the sticks into the boiling water and let it float there for about 15 seconds, then flip it over and let it float for about another 10 seconds. Then, very very carefully, take the stick out of the water and position it on the parchment paper-lined cookie sheet. Taking the sticks out is where they’re mostly to break, so try not to let any more of the dough than necessary stick off either end of the spatula when you fish each stick out of the water; if they do break, though, that’s okay, you can pinch the pieces back together some on the cookie sheet and they’ll more or less bake back together. Also, make sure to add another spoonful of baking soda to the water every few sticks; the dough sops up the soda over time, so if you don’t add some more every now and again you won’t get pretzels anymore!
- Bake the pretzels in the preheated oven for 10-15 minutes, or until golden brown.
- Brush your pretzels with some melted butter, sprinkle them with salt, add whatever other topping you want, and enjoy!
Once more, with pictures for your perusal:
Yield: 16 pretzels
Ingredients:
- 2 1/2 cup dough mix
- 3/8 tsp xanthan gum
- 1 tsp salt
- 5 tsp sugar, divided
- 1 cup warm water
- 2 packages (1 1/2 T) active dry yeast
- water and baking soda for soda bath
- 2-4 T melted butter for brushing
- sea salt and whatever other toppings you like for pretzels!
Directions:
| 1. In small bowl, dissolve 2 tsp of the sugar and the yeast into the warm water, and set it aside to proof for at least 5 minutes. | 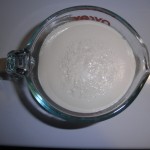 |
| 2. Meanwhile, in your stand mixer or other big mixing bowl, combine the dough mix, xanthan gum, salt, and remaining 1 T sugar, and mix thoroughly. | 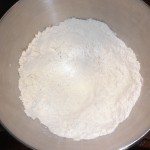 |
| 3. Add the yeast mixture to the dry ingredients, and mix till it comes together. The dough shouldn’t be stiff at all; in fact, it should be light and squishy enough that you’ll want to pinch it out instead of trying to roll it between your hands, but stiff enough that you can in fact pinch it out into a shape! But I’m getting ahead of myself. | 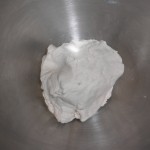 |
| 4. Lightly dust a countertop or other surface with dough mix, then cut the dough into 16 roughly equal pieces. Take each piece and gently shape it into a stick about 5-6″ long. | 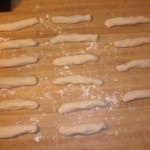 |
| 5. Space the sticks out by a few inches so they have room to rise, then let them proof 30 minutes to an hour, or until they’ve increased in size by at least a third. |  |
| 6. Ten or fifteen minutes before the dough’s finished rising, you’ll want to start your oven preheating to 375 degrees, put out a cookie sheet or two lined withparchment paper, AND start a pot of water boiling on the stove. You’ll need a pot big enough for one or two of the dough sticks to fit comfortably inside, but no larger. Once the water starts boiling, and the dough’s about done rising, carefully add a few spoonfuls of baking soda to the boiling water. It’ll churn and boil harder, then calm down. | 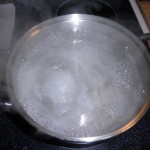 |
| 7. Now, it’s time to give the pretzel dough a baking soda bath. This is what gives pretzels their distinctive pretzel-ish taste! Using a slotted spatula, carefully put one of the sticks into the boiling water and let it float there for about 15 seconds, then flip it over and let it float for about another 10 seconds. Then, very very carefully, take the stick out of the water and position it on the parchment paper-lined cookie sheet. Taking the sticks out is where they’re mostly to break, so try not to let any more of the dough than necessary stick off either end of the spatula when you fish each stick out of the water; if they do break, though, that’s okay, you can pinch the pieces back together some on the cookie sheet and they’ll more or less bake back together. Also, make sure to add another spoonful of baking soda to the water every few sticks; the dough sops up the soda over time, so if you don’t add some more every now and again you won’t get pretzels anymore! | 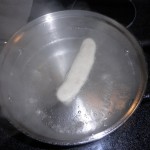 |
| 8. Bake the pretzels in the preheated oven for 10-15 minutes, or until golden brown. | 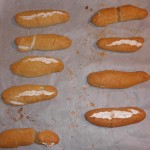 |
| 9. Brush your pretzels with some melted butter, sprinkle them with salt, add whatever other topping you want, and enjoy! | 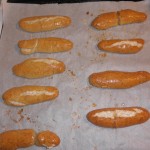 |

Leave a Reply