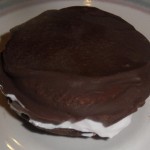
These cookie sandwiches started as an attempt to recreate Thin Mints (and if you stop before adding the filling, you’re reasonably close to them), but ended up as an accidental experiment in the taste buds of my various family and friends and which of them tasted which part of the deliciousness the most. Out of four male and four female tasters, the men always tasted one flavor, and the women always tasted another — but which tasted raspberry and which tasted mint, I’ll leave it to you to find out for yourself. 🙂
To make the basic cookie that is then transformed into a part of this cookie sandwich, you’ll need a whoopie pie pan, or possibly a muffin top pan — basically a pan with bowls the right size and shape to make very thin batter bake into a flat cookie. I’ve tried to make cookies of this type that hold a shape without a mold, but without any luck so far, so it’s a mold pan or bust for now at least. 🙂
There’s a lot of downtime in this recipe (waiting for the cookies to cool, waiting for them to refrigerate, waiting for them to freeze), so you want to start early in the day or even the day before, to be absolutely sure they’ll be ready in time for whatever occasion you’re making them for. You don’t actually to spend that much time in the kitchen, though, and all the waiting is well worth it. Everybody loves these things, except for those heathens among us who don’t like chocolate. But their problems are bigger than I alone can tackle. 😀
Mint-Raspberry Cookie Sandwiches
Yield: 6 sandwiches (12 cookies’ worth)
Ingredients:
for the cookies:
- 1/4 cup dough mix
- 1/16 tsp xanthan gum
- 3 T sugar
- 1 T cocoa powder
- 1/4 tsp baking powder
- 1/8 tsp baking soda
- 1/2 T oil
- 1 egg
- 2 T water
for the candy coating:
- 1 cup milk chocolate chips
- 1/2 T shortening
- scant 1/4 tsp peppermint extract
for the filling:
- 1 cup Cool Whip (whipped cream topping), thawed (not frozen)
- 2 T raspberry preserves
Directions:
1) Start the oven preheating to 350 degrees Farenheit. In the bowl of a stand mixer, whisk together the dry ingredients for the cookies (dough mix, xanthan gum, sugar, cocoa powder, baking powder, baking soda), then mix in the oil, eggs, and water with the paddle attachment. Make sure to scrape the bottom of the bowl thoroughly, or the batter won’t be homogeneous.
2) Spray the whoopie pie / muffin top pan with canola oil. What you want to do is divide the batter into the twelve cup as evenly as possible — which means just enough batter to cover the bottom of each cup, maybe a touch more. The best method I’ve found to date is to use a 2 T (1/8 cup) measure as a scoop, to avoid accidentally pouring too much batter into any one cup; pour a little more than half the scoop into each cup on your first pass, then even the cups out with what’s left over. Once the oven’s preheated, pop the pan in to bake for 8-10 minutes.
 |
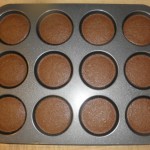 |
The cookies should pass a toothpick test. You’ll want them to cool completely before you try to take them out of the pan, though, or they’ll come apart; just set the whole pan on a cooling rack, and they should be cool in 15 minutes or so.
3) While the cookies cool, you can prep the ingredients for their candy coating. Grease a small-to-medium saucepan, then combine the chocolate chips, shortening, and peppermint extract in it. On a countertop by the stove, set out a pan covered in wax paper big enough to hold all twelve cookies without letting them touch (and make sure there’s room for that same pan in both the fridge and the freezer — you’ll need the space later).
4) Once the cookies are cool and ready to work with, put the saucepan on low to medium-low heat, and use a heat-resistant floppy spatula to stir the candy mixture as it melts. Stir constantly to make sure the mixture doesn’t stick and burn on the bottom of the pan. You don’t want the pan too hot for a number of reasons — too much heat risks burning the chocolate, or otherwise ruining the consistency of the candy coating, and in a few minutes you’re going to get some of this on your hands for sure when you coat the cookies. Keep stirring the mixture till it’s completely smooth and homogeneous, and make sure to to turn the heat down as low as possible as the mixture finishes melting. (On stovetops that retain heat well, you might even turn the burner off, but I usually just crank it down so low it’s barely on.)
 |
 |
5) Now it’s time to coat the cookies in the melted chocolate mixture. It’s a straightforward, if somewhat messy, procedure: Take a cookie in your off hand, and use the floppy spatula to scoop up some of the melted chocolate and “frost” one side of the cookie with it. You want just enough to cover the whole side; let extra move back onto the spatula. Then, put the cookie candied-side down on the wax-paper-on-a-cookie-sheet setup from step 3. Scoop up a little more chocolate mixture with the spatula, and “frost” the other side of the cookie where it sits on the cookie sheet. Once you’ve done all 12 cookies, use any melted chocolate you have left to patch up any spots that got shorted or don’t look even. The wax paper will be a mess, but that’s okay. Put the cookie sheet in the space you cleared in the fridge for at least half an hour, possibly up to an hour, so the candy coating can set.
 |
 |
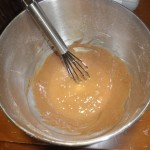
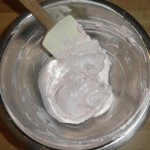
6) When the cookies are almost done setting, collect a small-to-medium mixing bowl, a whisk, and the Cool Whip and raspberry preserves to make the filling. It’s easy to make: Just whisk the Cool Whip and raspberry preserves together till uniform!
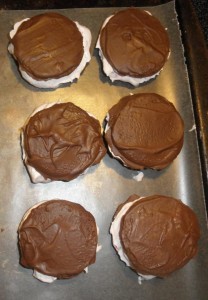
7) Take the set cookies out of the fridge, and carefully take them off the wax paper, breaking off any extraneous candy coating with your hands. (You will get chocolate all over your hands; but you can still work quickly and be fairly neat with a little care.) Once the wax paper’s cleaned up, lay the cookies out flat-side-up, and divide the filling equally among six of them. Then just put the other six cookies on top, and put the cookie sheet in the freezer for the cookies and filling to harden (which takes at least 3 hours). Don’t even try to eat these, or even put them in a Ziploc, before they’ve well and truly hardened — if the filling isn’t frozen, all you’ll do is make a huge mess. A tasty mess, but a huge mess nonetheless. 🙂
 |
 |
8) Once the cookie sandwiches have set, you can move them to a plastic bag and keep them in the freezer. If they last that long, that is. 🙂

Leave a Reply