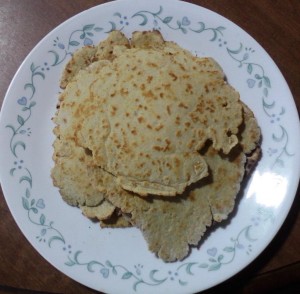
Sometimes, having a little bread goes a long way. 🙂
Making these involved a lot of swearing and throwing away ruined wax paper, until I finally got the dough to behave and figured out how to make the wax paper behave, too. Now, it’s no walk in the park to roll out these tortillas, but it’s not hard either, and the results are definitely worth it.
I have a feeling my paleo-only sister will be excited to see these every single time they’re made from now on, and she’s a hard sell when it comes to experimental anything. 🙂
Paleo Tortillas
Yield: 6-8 small tortillas, depending on size and thickness
Ingredients:
- 1 cup paleo dough mix, plus extra for rolling
- 1/2 tsp salt
- 1 tsp baking soda
- 1 T arrowroot flour
- 1/4 tsp agar-agar powder
- 1 T palm shortening, plus extra for rolling
- 1 egg
- 2 T coconut cream
- 1/4 cup water
Directions:
1. In a medium-large mixing bowl, whisk together the dry ingredients (paleo dough mix, salt, baking soda, agar-agar powder, and arrowroot flour). Then, with a fork or a pastry cutter, cut in the palm shortening until crumbly.
2. In a small bowl, whisk together the egg, coconut cream, and water until fully combined. Add this mixture to the dry mixture and combine with a fork until it forms a dough that integrates all the dry mixture. The dough should be moist but not very moist.
3. Take two pieces of wax paper large enough to roll a tortilla on. Use palm shortening to grease each one on one side, then dust that side with some paleo dough mix. (You shouldn’t need to re-grease the wax paper between tortillas, but you should re-dust it.)
4. Take a small handful of dough and press it between the greased-and-dusted wax paper sheets, then use a rolling pin to roll it out into a flattened circle, ideally about 1/8″ thick or a little more. Meanwhile, start an ungreased teflon skillet heating to medium-high to high heat.
5. Now, this is the tricky part — getting the dough circle off the wax paper! It should be easy to peel off the top layer, but go slowly and stop to press any cracks in the dough back together through the wax paper as you go. Then, put the top sheet back loosely and gently flip the whole paper-dough-paper stack over, so that the dough circle is only resting loosely on what is now the bottom sheet of wax paper, while what is now the top sheet of wax paper is still stuck to the dough.
Be gentle, and be willing to let bits off the edges of the dough circle stay stuck to the wax paper. It’s not hard to get the second sheet of wax paper off, as long as you’re willing to let the very edges of the circle stay stuck! You’ll end up with a slightly smaller, but very much intact, dough circle, and a ring of little scraps of dough stuck to the wax paper. Trust me, it is just plain easier this way. Those little scraps aren’t worth it — just scrape them off when you’re done and add them back to the next handful of dough.
6. Carefully drop the dough circle onto your hot skillet, and keep an eye on it; like normal tortillas, these cook fast. If the dough was rolled thin enough they should “bubble” some — not as well as flour tortillas, for sure, but some. Let the tortilla cook 10-20 seconds on one side, check to see if it looks done, then flip it with a large plastic slotted spatula if it is, let it cook as long on the other side, then transfer it to a plate.
7. Roll out the next handful of dough, and do it all again! These are best eaten very fresh, and can even be used to make soft tacos.


Leave a Reply