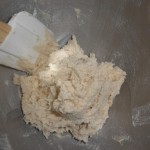
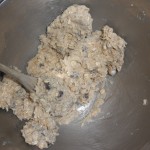
Making these cookies with my family is one of my earliest memories. We’d all sit around the table and churn out massive quantities of dough factory-style during Advent, throwing in Dutch ovens to serve as additional mixing bowls. We’d make cookies with no chip, with chocolate chips, with mint chocolate chips, with white chocolate chips, with peanut butter and chocolate chips, with cinnamon chips (once, and I don’t recommend it — yuck).
The best moment was when Daddy stopped just before adding the oats and chips, and turned to his only son (who was at most nine) and bequeathed the following fatherly wisdom: “When you’re older, and don’t have a woman in the house yet, this is the best time to eat the batter.”
He’s right, too. 🙂
I know not everyone can tolerate oats, but if you can, you’ll love these. They’re best when they’ve cooled for just a few minutes out of the oven, still chewy and warm. You can bake plenty at once and store them in tins if you want, but it works better to make dough balls, then store any you aren’t going to eat right now in the fridge for a few days and just bake as many as you’re going to eat at one time. (And if you snack on a few dough balls, well, so be it!) 🙂
This recipe doesn’t need a lot of pictures, so I’ll keep things short and sweet. Without further ado:
Oatmeal Chocolate Chip Cookies
Yield: 2 dozen
Ingredients:
- 1/2 cup sugar
- 1/2 cup brown sugar
- 1/2 cup shortening
- 1 egg
- 1/2 tsp vanilla
- 3/4 cup oat flour mix (or sweet rice mix, either works fine)
- 1/2 tsp salt
- 1/2 tsp baking soda
- 1 1/2 cups oats (quick or just plain rolled)
- 3 oz or so chocolate chips (optional)
Directions:
1. Preheat oven to 350 degrees Farenheit.
2. ??In stand mixer bowl, combine the sugar, brown sugar, and shortening, and blend well.
3. Add the egg and vanilla, and blend again.
4. Add the flour mix, salt, and baking soda, and blend a third time. (This is the point where it’s best to eat the dough!)
5. Add the oats and, if you’re using them, the chocolate chips, and integrate them by hand. It takes a few minutes, but it’s not hard to do.
6. Grease one or more cookie sheets and set them out. Then, take the dough and roll it into balls just small enough to fit inside your closed fist, or a little bit larger if you have tiny hands. Lay the dough balls out on the cookie sheet several inches apart so they have some room to spread out as they cook.
7. Bake for 12-15 minutes, or until golden brown. Let cool at least 5 minutes, ideally closer to 10, before you take them off the cookie sheet. If you want them to harden some more, put them on a cooling rack to cool, but you can (and, really, should) just eat them warm and chewy. 🙂


Leave a Reply