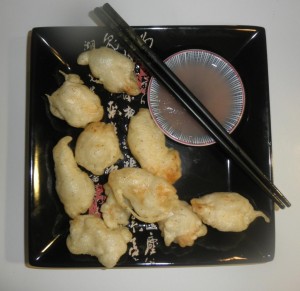
Who says you need flour to bread chicken? 🙂
When we used to order Chinese, everyone had their order: Mom wanted General Tso’s (and usually so did my brother), Dad and I would want chicken and broccoli, my sister and I would want chicken fried rice. But every so often, we threw in an order of sweet and sour chicken, or sweet and sour pork, to mix things up. I always loved sweet and sour sauce, and was gratified to find out it didn’t even need to be modified to be gluten-free; it was just a question of adjusting the ingredients until I had the balance of sweet and sour I liked best. And once you’re making sweet and sour sauce, don’t you want sweet and sour chicken to go with it? Ginny had taught me how to fry fish using a wet batter, so I knew it could be done. Adjust the seasoning, adjust the frying technique, and presto — bite-size morsels of Chinese-take-out goodness.
This recipe takes a little while, start to finish, but most of the real work is in the sauce, which you can do in large batches and save for later; with the chicken, it’s more a matter of waiting for it to cook and cycling out batches than it is doing anything too painstaking or difficult. But the effort’s well worth it, and you get plenty of chicken from just 1 egg’s worth of batter.
Here’s two recipes, then — one for the sauce, the other for the chicken.
Sweet and Sour Sauce
Yield: about 1 1/2 small jars’ worth
Ingredients:
- 1 cup pineapple juice
- 2 cups water
- 1/2 cup sugar
- 1/2 cup + 1 T red wine vinegar
- 1/4 cup + 1 T lemon juice
- 1/4 cup corn starch (or less), with enough cold water to make a slurry
- optionally, 8-14 drops red food coloring
Directions:
| 1. In a medium saucepan, combine the pineapple juice and water over low heat. While stirring, slowly add the sugar, until all the sugar is dissolved. |
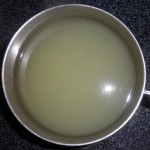 |
| 2. Slowly add the red wine vinegar and lemon juice, still stirring constantly. |
 |
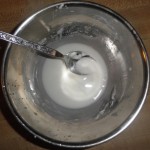
| 3. Combine the cornstarch with enough cold water to make a slurry — that is, until the cornstarch and water just combine into a loose goo, like so: |
 |
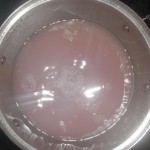
| 4. Add the slurry to the saucepan, then bring to a boil. Stir constantly until it reduces enough to thicken, keeping in mind that it’ll thicken more as it cools. (Here’s where to add the red food coloring to get that vivid red color if you want to.) |
 |
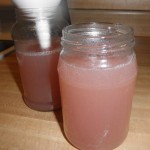
| 5. Remove from heat, and let the sauce thicken and cool. While it’s still warm (and thus not too thick), you can move it to glass jars for storage and let it finish cooling completely before storing it in the fridge. Reheat however much you want on the stove later. |
 |
Now that that’s out of the way, set the sauce aside and focus in on the chicken.
Sweet-and-Sour-Style Chicken
Yield: 12-15 tenders’ worth
Ingredients:
- 12-15 chicken tenders
- 1 cup sweet rice mix
- 1/16 tsp ground ginger
- 1/8 tsp garlic powder
- 3/8 tsp black pepper
- 1/2 tsp salt
- 1 egg
- 3/4 cup + 2 T water
Directions:
| 1. In a fryer, pot, or deep skillet, start oil heating to 375-400 degrees Farenheit. Start the chicken tenders defrosting at the same time; once they’re defrosted, drain them, rinse them, pat them dry, and cut them into bite-sized pieces. |
|
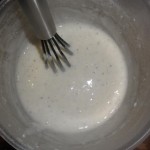
| 2. In a small bowl, whisk together everything but the chicken — that is, the sweet rice mix, ginger, garlic, pepper, salt, egg, and water. The result will be about the consistency of slightly thin pancake batter. As the oil finishes heating, set up the raw chicken, the batter, and a plate covered with either brown paper or paper towels on the same counter as the heating oil. You’ll want a nice neat assembly line going, so you can easily move the chicken along at each point in the process. |
 |
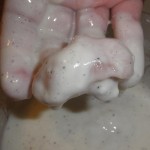
| 3. Speaking of which, once the oil’s heated (test it by seeing if a drop of water skips off it), dunk the bite-sized pieces of chicken into the batter, then fish them back out individually. It’s tempting to do them in handfuls to save time, but if you put more than one piece in the oil together, the batter will just cook together and you’ll get a glob of pieces that won’t want to separate! If your batter’s too thin, it’ll just run off, either when you fish the chicken out or when you drop it in the oil; add some sweet rice mix. If your batter’s too thick, the batter won’t crisp up very well when it cooks; add some water! |
 |
| 4. Carefully lower each piece of battered chicken into the hot oil. Let the nearest part of the chicken touch the oil first, then drop the rest of the chickenaway from you. That way, if you splash any oil, it splashes away from you. (Yes, I have splashed myself with oil, and yes, it is very painful and you should try very hard not to do it.) Go ahead and fill up the fryer (or pot, or deep skillet) with chicken. |
 |
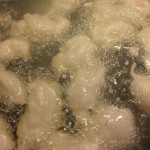
| 5. Let the chicken cook 3-4 minutes on either side. When the first side’s finished, use a slotted spoon or a slotted spatula to turn the chicken over. It won’t brown too much, but it does brown; resist the temptation to yank it out as soon as the breading looks done, though, because the chicken needs a chance to cook through. |
 |
| 6. Once both sides are cooked, use a slotted spoon or slotted spatula to fish the chicken out of the oil and put it on your prepared plate with paper towels or brown paper to drain and cool. Once all the chicken’s been cooked, there you are! Time to plate it and eat up. |
 |


Leave a Reply