(Skip to recipe!)
(Skip to recipe with pictures!)
Pizza.
Being able to chuck a quick pizza in the oven isn’t totally novel for someone stuck on a GF diet; in fact, GF pizza crusts aren’t hard to come by. They do, however, tend to cost $5 a crust, whereas I calculated the cost of mine (sans labor) at more like 65 cents each. (This tiny detail was what convinced my father to even try mine, since he’d gotten rather attached to the crusts he got off Amazon.)
Before I really perfected these, my family mostly ate quinoa pasta, fruit, meat, and rice; all perfectly good things to eat, with the possible exception of the quinoa pasta, depending on your taste. (I can hear my sister screaming about how I’m just not fair to quinoa already.) After I really perfected these, my mother started churning out about 30 of these a weekend in her household, and I started churning out about 10 a weekend in mine, and they became our go-to food for a quick meal.
The irony is that I never cared for pizza before getting diagnosed with celiac disease. It was too heavy and too greasy and more than a little gross, not least because I don’t like pizza sauce at all. We always ordered pizza rather than bought or made it, naturally, and I never wanted enough of it to merit my own little pizza, nor was splitting a pizza with someone else a very good option because they never did cut the pizza along the same diameter that divided up the half with sauce, from the half without sauce. 🙂 (Of course, that makes a lot more sense now that we make pizza a lot, and observe how the sauce expands across the crust as it cooks.)
But, I wanted to be able to produce pizza crusts for my brother’s birthday back in March, and refused to give up on improving them ever since. It was making pizza crusts incessantly that helped me perfect my dough mix that I use in so many of my recipes — I made my usual mix wrong one day, saw how workable the resulting dough was, then started furiously trying to replicate it. (And who says science doesn’t happen by accident?) From there it was just a few more innovations to the wonderful crusts you see before you today.
This recipe started from one of Jocelyn’s, but it’s been transformed many times since such an auspicious beginning. The procedure for rolling them out is a little unusual, but it works well as long as you’re attentive to detail. From start to finish, it’ll take about 2 1/2 hours to make a whole batch of this dough. I highly recommend making a full batch even if you aren’t planning to eat more than a little of it right away, since you can just parbake the remaining crusts, freeze them, then thaw them out to use later.
As usual, there’s a second iteration of the recipe, with pictures, below. With no further ado:
Yield: 9 one-person crusts, fewer if they’re bigger, more if they’re smaller
Ingredients:
- 3 cups hot water
- 1 T + 1 tsp sugar
- 2 T + 2 tsp yeast
- 6 1/2 cups dough mix
- 1/2 cup powdered dry milk
- 2 tsp xanthan gum
- 2 tsp salt
- 1/2 cup oil
- ALSO some cornmeal
Directions:
- In a large measuring container or mixing bowl, combine hot water, sugar, and yeast. Whisk thoroughly to dissolve the sugar and yeast into the water, then cover the mixture and set it aside to proof. It needs to proof about 5 minutes, or whenever you’re done with the rest of the ingredients and need it, whichever comes first. 🙂 You’ll know it’s done because it’s bubbling, or even frothy.
- Mix the dry ingredients (dough mix, powdered dry milk, xanthan gum, and salt) in stand mixer.
- Add the oil, and mix again; you won’t notice much difference.
- Now, add the yeast mixture to the dry mixture, slowly. There’s a lot of dry mix and a lot of liquid and it’ll just splash everywhere if you’re not careful. Keep the stand mixer going fairly slowly till the liquid starts to integrate, then gradually turn it up to maximum and let it run till all the bumps in the dough are smoothed out. The end result will be a very smooth, very soft, very sticky dough. Scrape down the sides and beater with a soft, stiff spatula.
- This dough is going to rise a lot, and we’ve made enough of it to fill my stand mixer up full, so it needs to be moved to a bigger bowl (or more than one bowl) to rise. Let it rise 30-90 minutes, or until doubled or more.
- As the dough finishes rising, it’s time to get ready to roll it out and parbake it. Preheat the oven to 400-425 degrees, depending on your oven. (I’ve found no way to figure out which to use with which oven other than just trying one.) Get out whatever flat pans you have you could roll out pizzas on, as well as bake them on! The dough’s too sticky to move from place to place, so you’ll be rolling them out on the pans you bake them on.
- To prep each pan for rolling, first spray it thoroughly with nonstick cooking spray, then sprinkle cornmeal on it generously. Then, ladle out a good-size dollop of dough, depending how big a pizza you want to roll out. For a one-person pizza, you’ll want a size in the ballpark of a man’s fist, maybe a bit bigger.
- Next, grab a small sheet of wax paper, which you’ll also want to spray with nonstick cooking spray. Yes, I know, wax paper is supposed to be nonstick and all, but trust me, if you don’t spray it, you’ll wish you had. 🙂 Lay down the sticky side of the wax paper over the lump of dough, press it down a little with your hand to get started, then whip out your trusty rolling pin and roll it flat, with the wax paper between the rolling pin and the dough. You can get it pretty thin, but be careful, and be gentle; the dough is very soft, and you’ll probably be paying more attention to keeping it from squishing out from under the rolling pin than anything else. (What’s nice is, the rolling pin is still clean after all this, and doesn’ t need to be washed.)
- Once the lump is rolled flat, peel the wax paper off, slowly and gently. 9 times out of 10, it’ll come off with no fuss, but every now and again it puts up a fight. If that happens, grab a soft, firm spatula and nudge the dough trying to stick to the wax paper back down to join its home in the crust. Then — and this is important — respray the wax paper. You can keep using the same sheet of wax paper for every crust, but only if you respray it every time! I like to roll out as many crusts at once as I have pans for, but if you don’t have that many pans, or don’t want to do that many dishes, you can reuse the same pan or two. Just make sure to respray the pans and add more cornmeal between each use.
- The oven’s probably preheated by now; once it is, put as many crusts as will fit in the oven, and parbake them for 6-8 minutes. Parbaking means they won’t be totally done when you take them out. They will, however, be done enough to scrape off the pan and put away in the freezer if you’re not eating them right now. In either case, put them out on cooling racks to cool down for now.
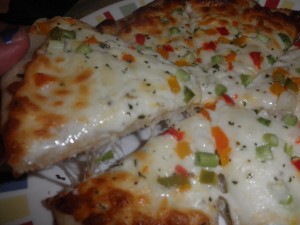
- If you aren’t going to eat (all) the crusts right now, you can freeze them once they’re cool. I usually put sheets of wax paper between individual crusts and store them in one huge Ziploc bag, then chuck it in my chest freezer. If you’re going to have some now, though, it’s time to get out sauce, cheese, and toppings! My favorite pizza is no sauce, topped with green onions and bell peppers.
- To finish baking the crusts, top them, then cook them 10-15 more minutes. (If they’re frozen, just put them in the preheating oven for 6-8 minutes to defrost them first. Once they aren’t cold to the touch in the center, you’re good to go.)
Whew, that was a long recipe. It’s even longer with some picture to help you see what you’re doing:
Yield: 9 one-person crusts, fewer if they’re bigger, more if they’re smaller
Ingredients:
- 3 cups hot water
- 1 T + 1 tsp sugar
- 2 T + 2 tsp yeast
- 6 1/2 cups dough mix
- 1/2 cup powdered dry milk
- 2 tsp xanthan gum
- 2 tsp salt
- 1/2 cup oil
- ALSO some cornmeal
Directions:
| 1. In a large measuring container or mixing bowl, combine hot water, sugar, and yeast. Whisk thoroughly to dissolve the sugar and yeast into the water, then cover the mixture and set it aside to proof. It needs to proof about 5 minutes, or whenever you’re done with the rest of the ingredients and need it, whichever comes first. 🙂 You’ll know it’s done because it’s bubbling, or even frothy. | 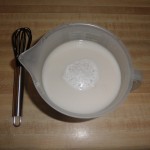 |
|
| 2. Mix the dry ingredients (dough mix, powdered dry milk, xanthan gum, and salt) in stand mixer. | 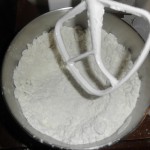 |
|
| 3. Add the oil, and mix again; you won’t notice much difference. | 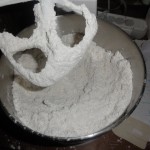 |
|
| 4. Now, add the yeast mixture to the dry mixture, slowly. There’s a lot of dry mix and a lot of liquid and it’ll just splash everywhere if you’re not careful. Keep the stand mixer going fairly slowly till the liquid starts to integrate, then gradually turn it up to maximum and let it run till all the bumps in the dough are smoothed out. The end result will be a very smooth, very soft, very sticky dough. Scrape down the sides and beater with a soft, stiff spatula. | 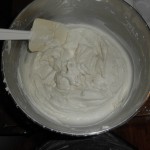 |
|
| 5. This dough is going to rise a lot, and we’ve made enough of it to fill my stand mixer up full, so it needs to be moved to a bigger bowl (or more than one bowl) to rise. Let it rise 30-90 minutes, or until doubled or more. | 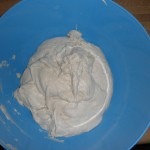 |
|
| 6. As the dough finishes rising, it’s time to get ready to roll it out and parbake it. Preheat the oven to 400-425 degrees, depending on your oven. (I’ve found no way to figure out which to use with which oven other than just trying one.) Get out whatever flat pans you have you could roll out pizzas on, as well as bake them on! The dough’s too sticky to move from place to place, so you’ll be rolling them out on the pans you bake them on. | 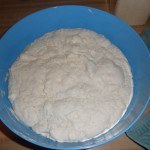 |
|
| 7. To prep each pan for rolling, first spray it thoroughly with nonstick cooking spray, then sprinkle cornmeal on it generously. Then, ladle out a good-size dollop of dough, depending how big a pizza you want to roll out. For a one-person pizza, you’ll want a size in the ballpark of a man’s fist, maybe a bit bigger. | 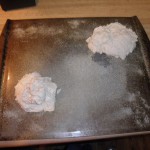 |
|
| 8. Next, grab a small sheet of wax paper, which you’ll also want to spray with nonstick cooking spray. Yes, I know, wax paper is supposed to be nonstick and all, but trust me, if you don’t spray it, you’ll wish you had. 🙂 Lay down the sticky side of the wax paper over the lump of dough, press it down a little with your hand to get started, then whip out your trusty rolling pin and roll it flat, with the wax paper between the rolling pin and the dough. You can get it pretty thin, but be careful, and be gentle; the dough is very soft, and you’ll probably be paying more attention to keeping it from squishing out from under the rolling pin than anything else. (What’s nice is, the rolling pin is still clean after all this, and doesn’ t need to be washed.) | 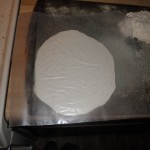 |
|
| 9. Once the lump is rolled flat, peel the wax paper off, slowly and gently. 9 times out of 10, it’ll come off with no fuss, but every now and again it puts up a fight. If that happens, grab a soft, firm spatula and nudge the dough trying to stick to the wax paper back down to join its home in the crust. Then — and this is important — respray the wax paper. You can keep using the same sheet of wax paper for every crust, but only if you respray it every time! I like to roll out as many crusts at once as I have pans for, but if you don’t have that many pans, or don’t want to do that many dishes, you can reuse the same pan or two. Just make sure to respray the pans and add more cornmeal between each use. | 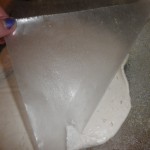 |
|
| 10. The oven’s probably preheated by now; once it is, put as many crusts as will fit in the oven, and parbake them for 6-8 minutes. Parbaking means they won’t be totally done when you take them out. They will, however, be done enough to scrape off the pan and put away in the freezer if you’re not eating them right now. In either case, put them out on cooling racks to cool down for now. | 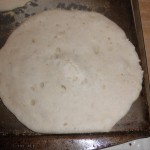 |
|
| 11. If you aren’t going to eat (all) the crusts right now, you can freeze them once they’re cool. I usually put sheets of wax paper between individual crusts and store them in one huge Ziploc bag, then chuck it in my chest freezer. If you’re going to have some now, though, it’s time to get out sauce, cheese, and toppings! My favorite pizza is no sauce, topped with green onions and bell peppers. | 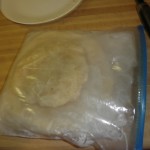 |
|
| 12. To finish baking the crusts, top them, then cook them 10-15 more minutes. (If they’re frozen, just put them in the preheating oven for 6-8 minutes to defrost them first. Once they aren’t cold to the touch in the center, you’re good to go.) |  |

Leave a Reply