EDIT: This recipe now has an updated version!
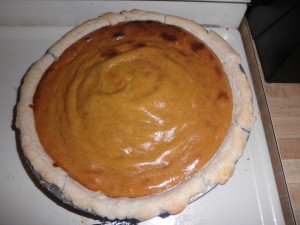
You might literally not believe how well this recipe came out in the end. It’s flaky, it holds together beautifully, it lasts until the last slice of pie (even when that takes a week!).
Pie crust is one of the first things my mother took a serious crack at back in the day, just a few months after my sister and I (and by extension my father) were diagnosed with celiac, since Thanksgiving was coming up soon. She probably ran through every pie crust recipe she could find anywhere on the internet; the results were . . . well, a little hard on the jaw. 🙂 Which isn’t her fault, of course, pie crust is hard to make when you don’t have to do it gluten-free, let alone when you do! For a solid year, her attempts failed, my attempts failed (though they made nice Frisbees, once you scooped the pie filling back out), and we’d basically written off pie as, well, pie-in-the-sky.
This last November, though, I tried again. There were a few reasons the time seemed right for plunging headfirst into another round of miserable failures; Thanksgiving was coming up again; I was in Chicago visiting Jocelyn, whose mind is invaluable when it comes to experimental food; and the hamburger buns I was trying to make refused to behave anyhow. So I thought hey, why not, grabbed Jocelyn’s pie crust recipe, replaced the flour with dough mix and gluten substitute, and made a pie.
A few small tweaks later, and the pie was delicious . . . while I was in Chicago. The second I got back to Texas, though, it all fell apart, literally. My involuntary-taste-testers-I-mean-friends reassured me this was, well, um, a decently workable thing, though I’d do better to pitch it as a crumble or cobbler than a pie. I, however, remembering my joyous, short-lived victory in Chicago, wouldn’t settle for it.
So I went searching for famous pie crust recipes made in Texas, and the result was nothing less than magnificent. Better, even, than my original northern success. (Wish I knew if this recipe worked up north, though; if someone tries it and it fails miserably, let me know, and I’ll dig out the other one for you!) I took a pecan pie along to a gathering of my grandfather’s friends and family on Thanksgiving Day, and submitted it to them for review: I was promptly told it was exactly like “real” pie crust, if not better than most “real” pie crust, good enough to sell, even.
Well, I don’t have the time or energy for that, but I do have this here blog. 🙂
You’ll want to start making the pie crust at least an hour before you want to bake the pie, preferably longer. It’s not a lot of work, but things have to chill more than once if you want it to come out right. As usual, here’s the recipe without pictures; you can find the recipe with pictures below.
EDIT: As I’m phasing out gluten substitute in my recipes, a quick note: You can substitute 1/4 tsp xanthan gum and 1/4 tsp guar gum for the gluten substitute; just bring the dough mix up to 1 cup. You can also put in 1/2 tsp imitation butter extract instead of the vanilla if you want.
Yield: 1 9-inch pie crust
Ingredients:
- 1/3 cup cold water
- 1/4 tsp vanilla (make sure it’s GF!)
- 1/2 cup shortening
- 7/8 cup + 1/2 T dough mix, plus a little extra for dusting
- 1 1/2 T gluten substitute
- 1/2 tsp salt
Directions:
- Combine the cold water and the vanilla in a freezer-safe bowl. Freeze until ice crystals have formed, but not until the mixture is frozen through; you want maybe a third to half the mixture to be ice. Too much liquid, and the dough will be really gooshy; not enough, and it’ll be hard to integrate the ice crystals. It depends on your freezer how long this takes, but I’d check on it every 15 minutes or so until I saw ice start to form, at which point I’d check every 5 minutes or so. Meanwhile, measure out the shortening and put it in the fridge to chill while the vanilla water freezes.
- When the vanilla water is just about frozen enough, combine dry ingredients in a medium-sized bowl (dough mix, gluten substitute, and salt).
- Cut the chilled shortening into the dry ingredients. It’ll get crumblier and crumblier, but only to a point; you know you’re done when it starts recombining into larger lumps that are integrated with the dry ingredients.
- Now, get the vanilla water, gently break off any ice crystals stuck to the sides of the container, and pour the whole thing into the bowl with everything else. (I know, I know, I was taught to add as little water as possible when making pie crust, but this works.) Use a fork to integrate all the water into the dough. It will take all the water if you keep at it; don’t worry about how squishy the dough gets as a result, squishy is okay.
- The second the water’s all integrated, wrap the resulting ball of dough up in plastic wrap, and stick it in the fridge to chill. It needs at least 30 minutes, though you could probably leave it overnight and have it be fine.
- Meanwhile, it’s time to prep the environment for rolling it out: Get two sheets of wax paper, spray them generously with cooking spray, then coat them with dough mix.
- Once the dough’s chilled, unwrap it, and press it between the sheets of wax paper. Roll the dough out into a rough circle a good inch or more wider than the pie plate you’re putting it in, then carefully peel off the top sheet of wax paper. If the paper was sprayed and floured generously enough, it’ll come off neatly.
- Center the pie plate upside down in the middle of the circle of dough, then carefully turn the dough and pie plate over together, using the bottom sheet of wax paper. You want to leave the bottom sheet of wax paper on the dough while you pat the dough into the pie plate, then peel the wax paper out, very carefully and a section at a time. You don’t want to have to roll it out all over again!
- Now you can trim the edges of the dough, and the crust’s ready to be filled. If you’re not going to fill it right away, cover it with plastic wrap and put it back in the fridge! In fact, any part of this dough you’re not working with immediately should get put back in the fridge, even if it’s only for a minute or two. Once it warms up, it won’t behave.
- Make a pie!
Once more, with pictures:
Yield: 1 9-inch pie crust
Ingredients:
- 1/3 cup cold water
- 1/4 tsp vanilla (make sure it’s GF!)
- 1/2 cup shortening
- 7/8 cup + 1/2 T dough mix, plus a little extra for dusting
- 1 1/2 T gluten substitute
- 1/2 tsp salt
Directions:
| 1. Combine the cold water and the vanilla in a freezer-safe bowl. Freeze until ice crystals have formed, but not until the mixture is frozen through; you want maybe a third to half the mixture to be ice. Too much liquid, and the dough will be really gooshy; not enough, and it’ll be hard to integrate the ice crystals. It depends on your freezer how long this takes, but I’d check on it every 15 minutes or so until I saw ice start to form, at which point I’d check every 5 minutes or so. Meanwhile, measure out the shortening and put it in the fridge to chill while the vanilla water freezes. | 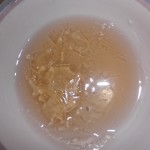 |
| 2. When the vanilla water is just about frozen enough, combine dry ingredients in a medium-sized bowl (dough mix, gluten substitute, and salt). | 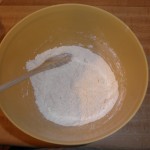 |
| 3. Cut the chilled shortening into the dry ingredients. It’ll get crumblier and crumblier, but only to a point; you know you’re done when it starts recombining into larger lumps that are integrated with the dry ingredients. | 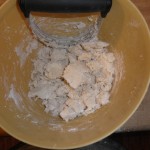 |
| 4. Now, get the vanilla water, gently break off any ice crystals stuck to the sides of the container, and pour the whole thing into the bowl with everything else. (I know, I know, I was taught to add as little water as possible when making pie crust, but this works.) Use a fork to integrate all the water into the dough. It will take all the water if you keep at it; don’t worry about how squishy the dough gets as a result, squishy is okay. | 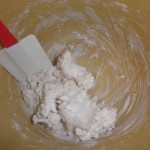 |
| 5. The second the water’s all integrated, wrap the resulting ball of dough up in plastic wrap, and stick it in the fridge to chill. It needs at least 30 minutes, though you could probably leave it overnight and have it be fine. | 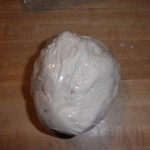 |
| 6. Meanwhile, it’s time to prep the environment for rolling it out: Get two sheets of wax paper, spray them generously with cooking spray, then coat them with dough mix. |  |
| 7. Once the dough’s chilled, unwrap it, and press it between the sheets of wax paper. Roll the dough out into a rough circle a good inch or more wider than the pie plate you’re putting it in, then carefully peel off the top sheet of wax paper. If the paper was sprayed and floured generously enough, it’ll come off neatly. | 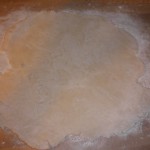 |
| 8. Center the pie plate upside down in the middle of the circle of dough, then carefully turn the dough and pie plate over together, using the bottom sheet of wax paper. You want to leave the bottom sheet of wax paper on the dough while you pat the dough into the pie plate, then peel the wax paper out, very carefully and a section at a time. You don’t want to have to roll it out all over again! | 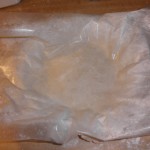 |
| 9. Now you can trim the edges of the dough, and the crust’s ready to be filled. If you’re not going to fill it right away, cover it with plastic wrap and put it back in the fridge! In fact, any part of this dough you’re not working with immediately should get put back in the fridge, even if it’s only for a minute or two. Once it warms up, it won’t behave. | 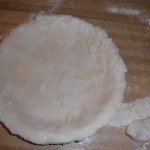 |
| 10. Make a pie! |

Leave a Reply