Go straight to recipe (skip chatty stuff)
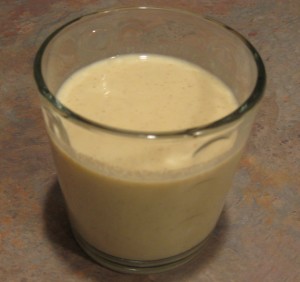
As a kid, eggnog from the store was a holiday staple in my house. As a matter of fact, my younger brothers still get very distressed if there is no eggnog purchased at various points during the Christmas and New Year’s period :-). I liked it okay, but it was rather cloyingly sweet, and such a funny shade of yellow. (Aside: Jennifer firmly maintains that store-bought eggnog tastes like pink bubblegum. Go figure. End Aside.) I’d never made eggnog from scratch until after I met Sean. You see, though you occasionally run across a sugar-free eggnog in stores (though it isn’t common where I’ve shopped), it is nasty. Sean actually didn’t really remember what eggnog was, so I took a stab at making him some. I didn’t let it get hot enough the first time I tried it, so it didn’t thicken properly, but my attempts this past holiday season have thickened up much more nicely. So, here I share the fruits of my labor with you!
A little history of eggnog: apparently very old fashioned versions of this drink did not necessarily get heated first. That’s right, they actually contained raw eggs in their unpasturized milk :-). However did the old-timers live long enough to raise the next generation, and ultimately yield our forward-thinking and germaphobic culture? 😛 These days you can’t find a recipe that doesn’t heat the nog, and so my recipe (which is, of course, built after the model of the recipes I could hunt up today) heats the nog and chills it down afterward. I used honey as the sweetener in part because this was back before I had stevia in its many forms, and in part because the thick liquid actually works pretty well for making a drink of this consistency. And, surprisingly enough, the final result does not taste like honey! It tastes just like eggnog…really really good eggnog that is much nicer than the store stuff, in my opinion.
I should mention that Sean has decided that he isn’t much of an eggnog fan…unless he puts Kahlua in it, in which case he really likes it :-). Kahlua is a coffee liqueur, and apparently many people like it in their eggnog, sugary variety or otherwise. Apparently others prefer rum <shrug>. Me, I like this eggnog all by itself, but you might want to try it with one of these other additions. Don’t put in too much, though, or it’ll overwhelm the flavor of the spices and you’ll just have a thick and rather oddly textured glass of alcohol-flavored holiday beverage :D. (If you’re after alcohol flavored holiday beverage, just make a punch already!)
Ingredients:
- 6 cups whole milk (yes, it matters what milk you use for this one)
- 2 eggs, beaten
- 2/3 cup honey (clover honey is best in this case; you don’t want a lot of spare flavor in there)
- 1/4 tsp ground cinnamon
- 1/4 tsp ground nutmeg
- 1/4 tsp salt
- 2 tsp vanilla extract
- 1 tsp rum extract (sometimes called “rum flavoring”, and the imitation stuff will do if that’s all you can find)
Directions:
1) In a large saucepan combine the milk, beaten eggs, honey, cinnamon, nutmeg, and salt. Whisk together well.
2) Bring this mixture to a boil over medium heat (no hotter–you don’t want to cook the egg into little bits in the boiling milk–yuck!), whisking/stirring constantly. I do use a whisk for this entire process, as it helps make sure that you don’t get any clumping. Continue heating until the mixture comes to a frothy boil. It should froth up and begin to rise up the sides of the pan when it is boiling hot while being stirred constantly. This usually takes 20-30 minutes, though it might be quicker if you started with room temperature milk.
3) Once it has frothed up remove the pan from the heat. Whisk in the vanilla and rum flavorings. Let the eggnog sit on the stove until it is relatively cooled (still very warm, but not boiling hot), and then give it another good whisking to make sure you don’t get a “skin” forming on the top of it (like you’ll get on tomato soup if you let it cool on the stove).
4) Now cover the pot (just with the pot lid is fine, or tinfoil if you don’t have a lid for the pot you used, though you should if you followed our kitchen basics advice!) and put the eggnog in the fridge to chill for at least 2 hours. You should let it get entirely chilled before consuming–that’ll insure the best flavor and that it is all the way thickened before you drink it. You can mix it again from time to time if you wish; it’ll help it cool and if a skin begins to form that’ll break it up (though I don’t have much trouble with that if I let it cool down a good bit from boiling before I put it in the fridge).
Enjoy!


Leave a Reply