It’s hilarious, really: Hamburgers are yet one more thing I never cared for when I was a kid, but like just fine now. I don’t think it had anything to do with the burger itself; I just had a hard time eating a whole burger at once, which I was naturally expected to do, and I didn’t like so many ingredients appearing all at once on a strange and infrequent food. (I was a finicky eater; you may have noticed.) And I generally prefer chicken to beef anyway. But when my brother went on the gluten-free diet, and started eating beef patties or sandwich meats with “buns” made of two thick slices of cheese, I figured I’d better make some hamburger buns! 🙂
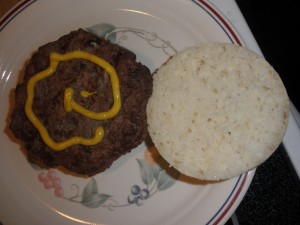
I served these to five hungry friends at a business meeting, and even the ones who weren’t celiacs loved them. As one put it, “It looks like a biscuit, but feels and tastes like a hamburger bun.” The bread works just as well for sandwiches, or anything else where you want a small, light-weight bread with a soft crust. This is the first time I’ve used gluten substitute in a dough I wanted to rise, and I’m very pleased with the results! The same recipe using xanthan gum was much, much crustier, and collapsed considerably in the oven. You still don’t need to use nearly as much as they say you should on the packaging, of course.
To make these buns, as with all doughs this soft, you’ll need a mold; I use 4″ springform cake pans to make hamburger buns, and a mini loaf pan to make sandwich buns. With this amount of dough, you’ll have enough to make 5 hamburger buns, or 6 sandwich buns. Unfortunately they don’t seem to freeze very well, but that might be because of my impatience; for all I know if you let them thaw on their own instead of throwing them in a preheating oven, they’ll be fine!
Hamburger Buns (Or Sandwich Bread)
Yield: 5 hamburger buns, or 6 mini-loaf sandwich buns.
Ingredients:
- 1 cup + 2 T warm water
- 2 T + 2 tsp sugar, divided
- 2 tsp yeast
- 2 cups + 3 T light dough mix, plus a little more for dusting the pans
- 3 T gluten substitute
- 1 1/4 tsp salt
- 1 T + 3/4 tsp powdered dry milk
- 2 1/2 T oil
Directions:
- Whisk together warm water, yeast, and 2 tsp of the sugar, then set the mixture aside to proof at least 5 minutes.
- Mix the remaining dry ingredients–light dough mix, gluten substitute, salt, powdered dry milk, and the remaining 2 T sugar–in a stand mixer. Add the oil and mix it in lightly.
- Once the yeast mixture is proofed, add that to the stand mixer and mix on high speed until all the lumps are gone and the dough is smooth.
- While it’s mixing, spray the pans you’re using with cooking spray, then “flour” them with some light dough mix. Trust me, they’ll be a lot harder to get out of the pans even if you only sprayed them!
- Spoon out the dough in equal parts into each of the individual pans.
- Now to let it rise. This dough rises beautifully, though it can take quite a while; in fact, you do run a risk of letting the dough rise too much, and spilling out of its mold! I usually preheat the oven to warm, turn it off, put the pans on a tray, then set them in the oven to rise for 1 to 1 1/2 hours. You can just let them rise covered on the countertop, but it’ll take 2 to 3 hours or longer depending on the temperature and humidity. Basically, you should let them rise until they’ve filled up their molds, and form a nice tall curve up above the top of the mold, without threatening to spill or tip over. That means they’ll have more than doubled in height by the time they’re ready to bake.
- Preheat the oven to 400 degrees, then bake for 15-20 minutes, or until a light golden brown.
- Let them cool a little before taking them out of their pans to finish cooling, especially if you aren’t using springform pans! And then it’s time to slice them open, fill them up with your favorite burger or sandwich meats and toppings, and enjoy!
And once again, with pictures to light the way!
Hamburger Buns (Or Sandwich Bread)
Yield: 5 hamburger buns, or 6 mini-loaf sandwich buns.
Ingredients:
- 1 cup + 2 T warm water
- 2 T + 2 tsp sugar, divided
- 2 tsp yeast
- 2 cups + 3 T light dough mix, plus a little more for dusting the pans
- 3 T gluten substitute
- 1 1/4 tsp salt
- 1 T + 3/4 tsp powdered dry milk
- 2 1/2 T oil
Directions:
| 1. Whisk together warm water, yeast, and 2 tsp of the sugar, then set the mixture aside to proof at least 5 minutes. | 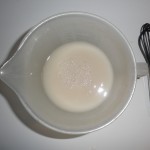 |
| 2. Mix the remaining dry ingredients–light dough mix, gluten substitute, salt, powdered dry milk, and the remaining 2 T sugar–in a stand mixer. Add the oil and mix it in lightly. | 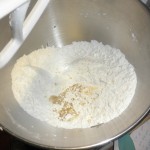 |
| 3. Once the yeast mixture is proofed, add that to the stand mixer and mix on high speed until all the lumps are gone and the dough is smooth. | 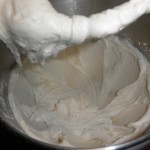 |
| 4. While it’s mixing, spray the pans you’re using with cooking spray, then “flour” them with some light dough mix. Trust me, they’ll be a lot harder to get out of the pans even if you only sprayed them! |  |
| 5. Spoon out the dough in equal parts into each of the individual pans. | 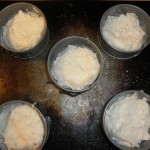 |
| 6. Now to let it rise. This dough rises beautifully, though it can take quite a while; in fact, you do run a risk of letting the dough rise too much, and spilling out of its mold! I usually preheat the oven to warm, turn it off, put the pans on a tray, then set them in the oven to rise for 1 to 1 1/2 hours. You can just let them rise covered on the countertop, but it’ll take 2 to 3 hours or longer depending on the temperature and humidity. | 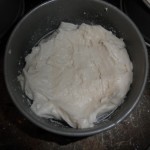 |
| Basically, you should let them rise until they’ve filled up their molds, and form a nice tall curve up above the top of the mold, without threatening to spill or tip over. That means they’ll have more than doubled in height by the time they’re ready to bake. | 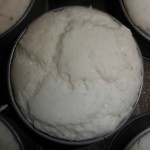 |
| 7. Preheat the oven to 400 degrees, then bake for 15-20 minutes, or until a light golden brown. | 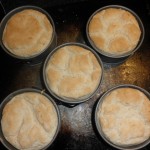 |
| 8. Let them cool a little before taking them out of their pans to finish cooling, especially if you aren’t using springform pans! And then it’s time to slice them open, fill them up with your favorite burger or sandwich meats and toppings, and enjoy! | 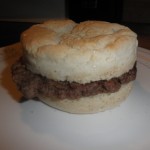 |

Leave a Reply