Ravioli are probably my favorite food in the universe. I’ve mentioned before my ultimate goal of recreating ravioli, but my profound joy in their existence is perhaps best expressed by the 45 minutes or so of spontaneous song I burst into celebrating the victory of their re-creation. My friend Ginny can and will testify that she was impressed by the length, variety, and sheer doo-lally euphoria that poured into this music, despite a few odd tangents into philosophical questions such as whether or not we know what it’s like for a clam to be happy, or even what it’s like to be a clam.
That music was equal parts happiness over the actual ravioli themselves, and a feeling of immense relief. The thing about celiac disease — about any disease or limitation that restricts drastically what you can eat — is that it takes power away from you. Yes, we bear it in good humor when we can, which is surprisingly often; yes, we cope with it by boldly claiming our niche and driving ourselves to diligence and excellence in filling that niche. Yes, we learn lessons about the brutal reality of human limitations that, God willing, increase what virtues we possess rather than damage them. But it always still hurts. You had something, the sort of something that your brain didn’t even categorize as able to be lost, but you lost it anyway. Your life changed completely and you had no say. I often get accused of being an obsessive perfectionist, and, well, it’s true, but I think what people often miss is that it’s not just about making really, really good food I can have, and seeing my family happy when I give it to them. It’s about refusing to let my disease diminish me. It’s about taking power back.
Okay, philosophical aside over. 🙂 These are fun to make, though I won’t go as far as “easy”; they certainly aren’t simple. God knows when Gordon Ramsay sets making ravioli from scratch as an elimination test on a cooking competition, that means it’s not a question of “put everything in the bowl and turn the stand mixer on.” (Yes, I watch reality-TV cooking shows, a habit I’ll defend another time.) 🙂 But they’re well worth the effort.
The general concept here, of course, extends well past cheese ravioli; the internet is full of cheerful instructions on how to make all sorts of ravioli filling, and ravioli sauce, and ravioli shapes, and more power to you for trying as many as you like. But, this is my favorite kind of ravioli, so this is the kind I’m blogging about today. 🙂
Cheese Ravioli
Yield: About 27 ravioli, at least with my ravioli stamp and how full I make them — really, anywhere from 20-40 depending on size!
Ingredients:
For the pasta — 3/4 pound of homemade gluten-free pasta dough, give or take
- 1 cup ricotta cheese
- 1 cup grated parmesan cheese
- 1/2 cup grated mozzarella cheese
- 1/8 pepper
- 1/8 tsp salt
- 1/4 tsp basil
- 1/4 tsp parsley
- 1/8 tsp marjoram
- 1/8 tsp thyme
- 1/8 tsp minced garlic
- 1 egg
Directions:
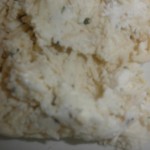
1. First things first — making the filling. This part’s easy. Just grab a small-to-medium mixing bowl, put all the filling ingredients in the bowl, and mix them together thoroughly with a wooden spoon. The end result will look something like this:
Cover the bowl, and stick it in the fridge till the pasta’s ready. If you keep it covered and refrigerated it’ll keep a while, as long as a week really; the top will look a little crusted, but if you stir it back up it’s fine. This means you can just make a few ravioli at a time if you don’t want to make, knead, roll, cut, and stuff 3/4 lb worth of pasta at once! I often make 1/4 lb or so at a time, and just use up the filling as I go.
2. Next, time to make your pasta dough. This is a more involved undertaking, detailed thoroughly here. You want the dough on the soft side, so it’ll be easier to seal the ravioli. When it comes to rolling it out, you want option 5(b), the pasta roller, and you want to make sheets that are pretty thin — the second-thinnest setting on the roller is what I do, and I’ve read a number of recipes that recommend the same. Just make one sheet at a time, and remember to keep any dough you aren’t currently working with wrapped up in plastic wrap! If the dough dries out, it’ll be way, way harder to seal up your ravioli.
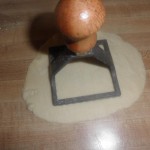
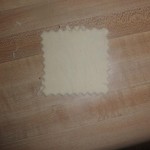
3. Take your sheet of dough and cut out uniform pieces, round or square, whichever you like. I use a square ravioli stamp most of the time, but when I want round ravioli I just use a glass cup. Peel the rest of the dough sheet away and quickly knead it back into the dough ball and re-cover it.
 |
 |
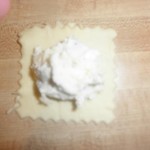
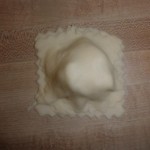
4. Now, take a small spoonful of filling and place it in the middle of one square, making sure the edges are clean. Take a second square and lay it over the filling, gently pressing the edges of the top square onto the bottom square, working from one side and moving to the other. This is the kind of thing that’s easy once you’re done it a few times, and a pain in the butt until then, so don’t worry if you just can’t get it right at first. Ideally you want as much filling and as little air as possible inside the ravioli, but too much of either makes it more likely to unseal when you cook it.
 |
 |
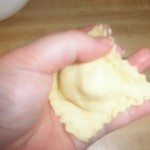
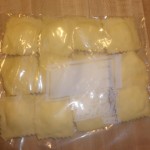
5. Pick up the ravioli (carefully!), and go around the edges one more time, pinching it with your fingers gently. The pasta dough should be fairly soft, so this should be easy. If the dough’s too stiff, or it’s gotten too dry, just barely wet your fingers and try again; the moisture should let you seal the ravioli up with a little extra work and a deft touch. At this point you can freeze any ravioli you aren’t planning to make right now; just stack them two high at most in a baggie and lay them out in the freezer where they won’t get squished. Any you are planning to make, just set aside as you keep working. They’ll start to dry out some, but as long as they aren’t out more than half an hour that’s fine.
 |
 |
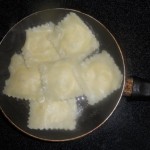
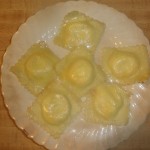
6. And last but not least, time to cook the ravioli! They should boil 3-4 minutes, depending how big they are; they’ll float about halfway through. (If they were frozen, 5 minutes or so should do it.) You want the thickest part of the pasta to just cook, and you want the filling to heat through and melt; if you try one and it meets both criteria, it’s done! I like to sautée them in a little butter to give them a little texture and extra flavor.
 |
 |
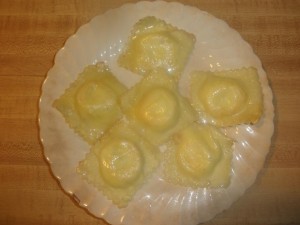
7. Yummy.

Leave a Reply