This recipe makes me consider the problem of problem-solving.
I’ve always problem-solved in an unusual way, as best as I can tell; not exactly in an optimal way, but in a highly experimental way. Mind you, they’re rigorous experiments, and for brief or abstract problems most of the experiment takes place in my head. Say the problem at hand is figuring out how to get four people, who share two cars, to five different places throughout the day, when all four people can drive, but two of them have a hard time driving for physical reasons, one dislikes having other people drive him because he’s an adult male, and the last one can drive but is relatively inexperienced, so it’s a good long-term goal to gradually increase the difficulty and variety of the driving she has to do so that she can improve her driving without undue stress or risk. And most of these appointments overlap. I’d solve that problem by experiment, but it would pretty much all be mental and verbal, so it would be more like solving it by hypothesis — I’d propose a working solution to everyone else involved, they’d object, perhaps counter-propose, then I’d form a new plan and counter-propose that, and so on. Replace the driving plan with iterations of a new gluten-free food I’m trying to improve, and counter-proposals with those poor souls eating said food and giving feedback, and that’s pretty much exactly how I experiment in the kitchen.
The reason this recipe puts me in mind of that process is that it highlights my tendency to streamline my understanding of how to make dough behave into basic underlying principles that don’t always hold true. For example, when I’m teaching someone else why a dough works a certain way — say, Ginny, or Jocelyn — I’ll always, always stress that butter weighs down the dough, and it won’t rise. That’s an oversimplification — it won’t rise much under any conditions, and only under some conditions will it not rise at all. What’s more, I’ll sound very authoritative about this general principle, which, like any scientific principle derived from experiment, is likely to get thrown straight out the window if I discover something new. Like, say, combining xanthan gum and guar gum to make workable doughs that are dense and flexible enough to shape, but still puff up nicely when full of fat.
The problem with problem-solving then, is that you tend to get caught up in the boundaries set by your own iterative solution-finding process. Most of the time that’s good — if you know something didn’t work in the past, you’re saving yourself time, effort, and embarrassment not bothering to try it again — but it can also be bad. It was after two years of finding strange and unusual ways to make doughs come out the right shape, certain doing it the conventional way would never work, that I’ve come back to the “normal” way of making cinnamon rolls, crescent rolls, and (coming soon) biscuits. I couldn’t have done that when I started; I didn’t know how. I didn’t start out with dough mix, or the idea to use xanthan gum and guar gum together. It’s a weird process to look at from the inside, like my own experiences tried to trick me, very helpfully; but the rules keep changing.
Anyway. 🙂 These crescent rolls are easy, tasty, and even fun to make. They aren’t flaky, but they’re so buttery and good you just won’t care. Just make sure to brush them with butter very generously before they go in the oven, in case you over-“floured” your workspace a bit; the butter will sop up any dough mix that isn’t integrated into the dough.
Crescent Rolls
Yield: 16 rolls (though I usually just make 8, and refrigerate the rest of the dough for later)
Ingredients:
- 2 1/2 tsp yeast
- 1 1/2 tsp sugar
- 2/3 cup hot water
- 3 T softened butter
- 1 egg
- 2 T oil
- 1/3 cup sugar
- 1 3/4 cup dough mix
- 2 tsp xanthan gum
- 3/4 tsp guar gum
- 1/4 tsp baking soda
- 2 tsp baking powder
- 3/4 tsp salt
- 1/4 tsp vanilla
- 2 tsp imitation butter extract
- about 2 T melted butter for brushing
Directions:
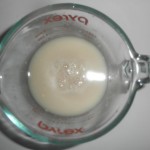
1. You’ll make the dough in three stages: First, in a small bowl or big measuring cup, combine the hot water, yeast, and 1 1/2 tsp sugar; whisk them together, then set the mixture aside to proof while you make the rest of the dough.
 |
 |
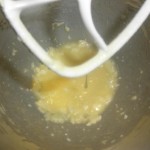
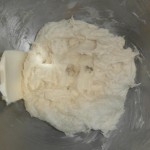
2. Second, in the bowl of a stand mixer, cream together the butter, egg, oil, and 1/3 cup sugar. (Either the whisk or paddle attachments works fine.) You don’t need to cream it until smooth, just until essentially integrated. Third, add the remaining ingredients — dough mix, xanthan gum, guar gum, baking soda, baking powder, salt, vanilla, and butter extract — and combine them just a little with the mixture in the stand mixer. They won’t combine very well until you add more liquid, so once the yeast mixture’s proofed mix that in too. Now you’ll want to use the paddle attachment until you get a homogeneous dough that almost even pulls away from the edges of the bowl.
 |
 |
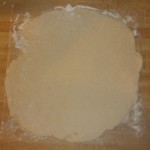
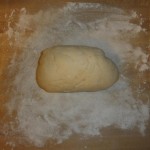
3. If you aren’t planning to make all 16 crescent rolls right now (or any of them at all, really), now’s the time to divide up the dough and store any you aren’t going to use. I usually wrap up half the dough in plastic wrap and put it in the fridge — both halves if I’m not planning to actually bake these till later. In any case, once you’re ready to bake, preheat the oven to 375, then lay out generously greased-and-“floured”/dough-mixed wax paper in a square on the countertop.
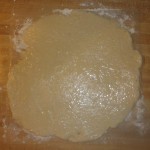
4. With a “floured”/dough-mixed rolling pin, roll the dough into a circle about the width of the wax paper. (It should be maybe 1/4 inch thick or less, I’m terrible at judging.) The dough should be fairly flexible and hold together well, but you might want to pick it up and flip it over a few times as you work to make sure it’s not too sticky and not too thin. Avoid the temptation to just knead in more dough mix till it’s smooth, though; the more mix you use, the chalkier the result will be! When it’s ready, brush the top of the dough circle generously with melted butter.
 |
 |
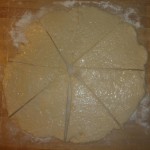
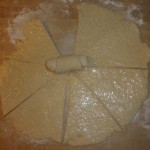
5. Cut the circle into eighths with a knife so that you have eight triangles with rounded outer edges. Roll up each triangle, starting at the outer edge and going in to the center. Add a curve to the result, and voila — crescent rolls!
 |
 |
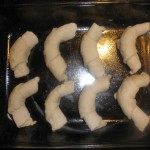
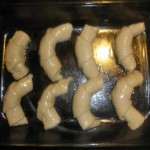
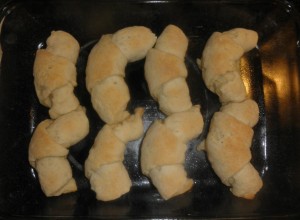
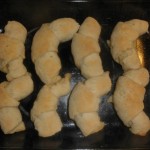
6. Move the crescent rolls to a greased pan. (If you’re using a glass pan, like I am in these pictures, you’ll want a 400-degree oven, but if you’re using metal, 375.) Brush the tops of the rolls with the rest of the melted butter, then put them in to bake in the preheated oven for 12-14 minutes.
 |
 |
7. They’re best fresh, so everybody dig in!

Leave a Reply