The chaos of moving continues here in Seattle, so you once again get me instead of Jocelyn. I came to help her move, and if helping her move means covering the blog for her, then gosh darn it that’s what I’m gonna do. 🙂
I love ice cream cones. A lot. My favorite part is always the very last bite, when you pop the bottom tip of the cone into your mouth and crunch into it, and just the right amount of ice cream oozes out. I spent a summer in college working at a Coldstone Creamery, mostly in the early afternoon, so I made a lot of waffle cones every day, to the point of being dubbed “the waffle queen” by my coworkers. With the right equipment, it was easy as spit: Get large prepackaged bag of mix, add the amount of water the package tells you to, add some cinnamon (which should swirl, not vanish homogeneously into the batter), mix thin batter. Heat expensive specialized waffle cone irons. Pour batter onto irons, close irons, wait, get cooked waffle back off irons and fold it into a waffle cone or waffle bowl very quickly, preferably without burning your fingers (but burning your fingers if you must). Lather, rinse, repeat.
These cones are nothing like that.
For one, I don’t have a specialized waffle cone iron, and after browsing some on Amazon I don’t want one, either. Way too much money to spend on equipment that might or might not end up being what I need to make gluten-free waffle cones. For another, as I quickly discovered trying other methods, anyone who thinks a gluten-free “waffle” will bend instead of breaking even when piping hot is going to be sadly, sadly disappointed.
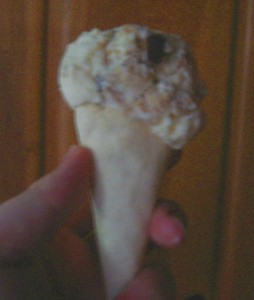
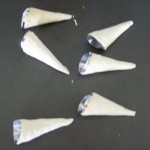
So, obviously, I needed to fold dough into a cone shape before it cooked. I bought some cream horn molds to get the shape right, and here’s the result. They take a little time and patience, and you can only make cones as big as your cream horn molds, but it’s worth it in the end. Personally, I choose to view my kid-size cones as an excellent means of portion control. 🙂
Ice Cream Cones
Yield: 13-14 kid-size cones, fewer if you have molds for larger cones
Ingredients:
- 9 T dough mix, plus a bit more for dusting
- 1 T sugar (or brown sugar if you want a stronger flavor
- 1/8 tsp baking powder
- 1/8 tsp salt
- 1/8 tsp xanthan gum
- 1/8 tsp guar gum
- 1 T shortening
- 1/8 tsp vanilla extract
- 8 tsp cold water
Directions:
1. Preheat the oven to 325 degrees Farenheit.
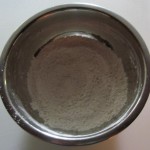
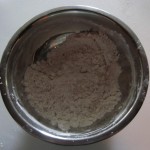
2. In a medium mixing bowl, whisk together dry ingredients — dough mix, sugar, baking powder, salt, xanthan gum, and guar gum. Then, using a fork, cut in shortening until crumbly.
 |
 |
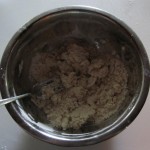
3. Now add the vanilla and cold water to the mixing bowl, and use the fork to bring the dough together. Be patient, and avoid the temptation to add more water! You can get the dough to come about halfway together just by stirring (as seen in the picture on the left). Once it gets to that point, use your hands to press the rest of the mixture together, and knead the dough into a smooth ball. If, at this point, it still stubbornly refuses to come together, add more water no more than a drop or two at a time. If this dough is too soggy, you won’t be able to manipulate it like you need to later on.
 |
 |
4. Cut the finished dough into 12 even pieces. (I know, up there it says this recipe yields 13-14 cones — that’s because you won’t quite use all of each piece to make a cone, and the leftover scraps will get you 1 or 2 more.) I usually roll the dough into a log to measure even lengths, but whatever method will do; it doesn’t have to be too exact.
5. Take one cream horn mold and one piece of dough. Dust the mold lightly in dough mix, and also lightly dust a rolling pin and your rolling surface. You want to roll the dough quite thin — thin enough you can see your fingers through it, but not so thin it tears in your hands when you pick it up. It’ll probably take a few tries (God knows I needed some practice) but you’ll get a hang of it quite quickly. Don’t worry if you have to do your first few cones twice; just roll the dough piece back up and start again.
 |
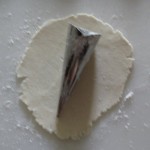 |
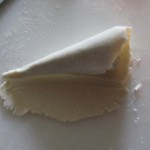
6. Once the dough’s rolled out, wrap the dough piece snugly around the mold. I find the best way to do this is to press one side of the mold down on one side of the dough (but not at the edge), then gather up the near edge and press it gently but firmly against the mold. Once the near edge is secure, slowly roll the mold over the rest of the dough until the entire mold’s covered. Carefully cut off any extra dough — you don’t want the dough to layer over itself any more than it has to, as the overlapping section won’t bake quite as well. You can use bits of extra dough to cover spots near the top of the mold that aren’t covered if need be.
7. Once you’ve wrapped all your molds, lay them out on an ungreased cookie sheet or other pan, and bake in the preheated oven for 15 minutes.
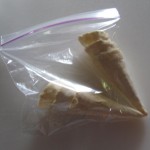
8. Let the cones cool just for a minute or two before taking them off their molds. The cones and molds alike are small and so should cool very quickly. Stack up the cones and store them in a plastic baggie. If you don’t want to shape and bake the rest of your dough right now (if, like me, you only have 6 molds, you’ll use less than half the dough in one baking), you can store it in another plastic baggie in the fridge. Then, have an ice cream cone!
 |
 |


Leave a Reply