Jocelyn’s on vacation in D.C. this week, so you guys get me instead. 🙂
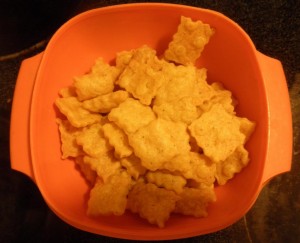
Sometimes I think the best way to come up with a new recipe to try is to spend some time around people who aren’t on a restricted diet. We get used to only certain foods or kinds of food being available — being possible — and I at least tend not to think about whole kinds of food I can’t have, like cheesy crackers. Then I spend a few weeks around my best friend’s baby, who loves Goldfish, and I think, “I wonder if I could make those?” And it turns out the answer is yes, and they’re delicious. 🙂
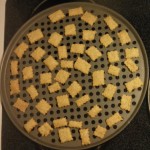
You need a food processor, but the recipe itself is easy and fairly quick to make. An aerated pan is a handy plus, to make sure both sides of the crackers crisp nicely, but I don’t think it’s strictly necessary. Also not strictly necessary is a pastry wheel with a serrated edge, but it means the sides of the crackers will look all pretty. 😀
I only did a half-batch for these pictures, and even then didn’t always take pictures of the whole batch, but you get the idea. 🙂
Cheese Crackers
Yield: over a hundred individual crackers
Ingredients:
- 1 cup dough mix, plus extra for dusting
- 1/8 tsp xanthan gum
- 1/8 tsp guar gum
- 1/8 tsp paprika
- 1/2 tsp salt
- 1/2 tsp pepper
- 2 cups (8 oz) grated sharp cheddar cheese
- 4 T cold butter, cut into pieces
- 4-6 T cold water
Directions:
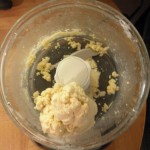
1. In the bowl of a food processor, pulse together the dough mix, xanthan gum, guar gum, paprika, salt, pepper, butter, and cheese. It’ll form a fairly uniform “meal.” Then, a tablespoon at a time, add the cold water, pulsing after each addition. Keep adding water and pulsing the mixture until the dough just starts to form up into a ball and ride the blade.
 |
 |
2. Roll the dough into a neat ball, then wrap it up in plastic wrap and stick it in the fridge for at least 20 minutes (or up to a day, if need be). When you get it back out, start the oven preheating to 350 degrees Farenheit.
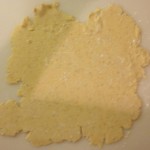
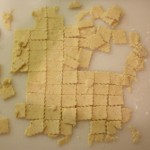
3. Dust a large cutting board and rolling pin lightly with dough mix, then carefully roll the dough out to 1/8″ thick. (It’ll be stiff at first, but stick with it, things get better fast.) The thinner the dough, the crispier the cracker, so roll it out as even as you can. Then all you have to do is cut the dough into bite-size squares. There’ll inevitably be some scrap dough left over, which you can ball up and roll out again.
 |
 |
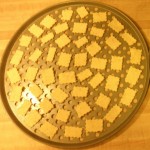
4. Generously grease a non-stick pan (aerated if you have one), and lay the squares out on it. They don’t have to be particularly far apart, just make sure they’re not touching. Pop them in the preheated oven for 13-15 minutes, and not a minute longer. They may or may not look done, especially if you had to use more water, but they’ll taste burned long before they look it, so err on the side of taking them out early!
 |
 |
5. Let the crackers cool a bit before you take them off the pan, and let them cool completely before eating any of them. They’ll get crispier as they cool. Once they’re at room temperature, though, good luck not eating them all in one sitting. 🙂

Leave a Reply