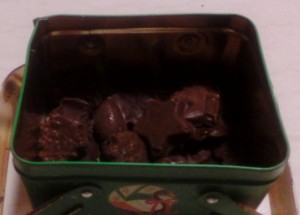
See, my big not-so-secret secret is that I don’t have a pioneering thought in my head. 🙂 Jocelyn posts kolaches? I post kolaches. Jocelyn posts cinnamon rolls? I post cinnamon rolls. Jocelyn posts homemade chocolate? I post homemade chocolate. I’d be lost without my guru.
So far, one of the most annoying things about giving up sugar has been giving up chocolate. Don’t get me wrong, I’m glad I did — nobody ever quite wants to talk about eating ten candy bars in a sitting, but I’ve always had blood sugar problems, and dammit-food-makes-me-feel-better problems, so it would happen. Not thrilled about it.
But now, thanks to standing on my guru’s remarkably high and sturdy shoulders, I can snack on chocolate again — and with way less worry about what I’m eating. This chocolate is sugar-free, gluten-free, dairy-free, soy-free — the whole paleo cornucopia. You’d think it really would be veering into “food-free food” territory but any fan of dark chocolate should love this stuff. Ginny offered some to our friend Christy, describing it as “sugar-free, dairy-free chocolate” and received a look of intense skepticism; then Christy ate some, and was intensely happy about it! 😀
The main trick with this chocolate is patience. It doesn’t take long to make, and it’s actually very little work, but you don’t want to rush any of the steps, especially cooling. If you just chuck the chocolate straight into the fridge, bits of white coconut oil will congeal out of the chocolate along the edges, which is gross. If you chuck it straight into the freezer, it’ll happen way more, and be super super gross. So let it take its time cooling and setting; it’ll be worth it in the end. I put it in molds to make candies, but I’m also working on making cashew butter “peanut butter cups”, and I see candy bars in the not-too-distant future…
But yeah. Chocolate. Sells itself, really. 🙂
Paleo Chocolate
Yield: 15-20 small candies, depending on size
Ingredients:
- 1/4 cup coconut oil (or, for a creamier version, palm shortening)
- 3/4 tsp vanilla extract
- 18 drops (~3/16 tsp) liquid stevia extract
- 1/4 cup cocoa powder
- 2 T coconut cream
Directions:
1. In a very small saucepan over the lowest heat your stove can give, melt the coconut oil. You don’t want to heat it any more than it takes to melt it — you’re not so much cooking this chocolate as just warming it up, mixing it together, then coaxing it back to a solid state. Measure out the rest of your ingredients while you wait, and stir every so often with a whisk to help it melt — it shouldn’t take long.
2. Once the coconut oil is completely melted, turn off the burner. Add the vanilla extract and stevia extract. Remove from heat.
3. Gently whisk in the cocoa powder until fully combined. Touch a little of the mixture on the whisk to make sure it’s cool enough to touch (even if it’s hot); once it is, gently whisk in the coconut cream until fully combined.
You should now have a smooth, fairly viscous, but still fluid melted chocolate. (If the coconut cream broke apart weirdly, or the chocolate isn’t smooth, it was still too hot! There’s not really anything you can do to save it, and you’ll have to start over.)
4. If you just want chocolate prepared for general use later, spread it over wax paper in a pan and let it cool that way. If you want the chocolate to set in shapes, spoon it into your molds (I’ve used mini muffin cups and candy molds). Either way, it shouldn’t be very thick to cool — no more than 1/2″ at the outside. (You could probably make it thicker but I’d give it much longer to cool in that case.)
5. Let the chocolate sit uncovered at room temperature for 15 minutes or so. Then tuck it into the fridge to harden for an hour, at least.
You can consider it done here, but it’ll still be on the soft side; if you want it hard enough to chop up, or you want it to keep its shape to bake with, you should move it to the freezer. I also recommend storing it in the freezer long-term, and moving it back to the fridge when you’re ready to eat it.
6. Enjoy your guilt-free dark chocolate! 😀


Leave a Reply