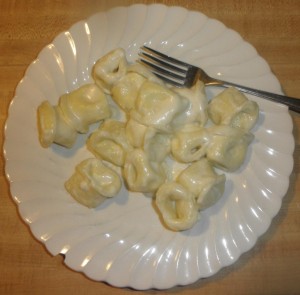
I promise this’ll be my last post about pasta (at least for a while) — but there’s nothing quite like a good cheesy filling in a creamy sauce, I just had to post about tortellini. It takes me about 40 minutes start to finish to make a meal of these from scratch, but it’s so very worth it that I’ve had them for lunch probably 5 days a week since it first entered my head to try them. It’s a weird world when good pasta is a delicacy instead of a staple — before going gluten-free I positively lived on spaghetti! — but hey, delicacies are worth their while. 🙂 Even my brother likes these enough to actually help me make them from time to time, and boy is it usually a pain to get him to help in the kitchen.
I have to say, though, that tortellini are one of those things that seem a lot harder to make than they actually are. When I decided to give them a shot I expected to be baffled and frustrated by some sort of arcane construction process that would befuddle my slow-learning fingers, but I watched a few instructional videos online and made my first tortellini perfectly. (If my instructions below aren’t clear enough, by all means look elsewhere for clarity!)
Now all these pretty pictures are making me want some tortellini, so I’ll get right to the recipe. 🙂
Tortellini and Cream Sauce
Yield: About 16-18 tortellini; enough for one person to have a meal
For the pasta — 1/4 lb of homemade gluten-free pasta dough
- 1 cup ricotta cheese
- 1 1/2 cup grated mozzarella cheese
- 1/8 pepper
- 1/4 tsp salt
- 1/4 tsp basil
- 1/4 tsp parsley
- 1/8 tsp marjoram
- 1/8 tsp thyme
- 1/8 tsp garlic powder
- 1 egg
For the sauce:
- 1 T butter
- 1/4 cup half-and-half
- 1-2 T parmesan
Directions:
1. First, to make the filling. (It’s slightly different from the filling for my cheese ravioli; since there’s parmesan in the sauce, you don’t really need it in the filling, too.) Get a small-to-medium mixing bowl, combine all the filling ingredients, and mix thoroughly. Unless you’re tackling the time-consuming undertaking of using up all the filling at once, there’ll be plenty left over, so if you have a mixing bowl with a fitted lid you might use that so you can just stick the rest of the filling in the fridge when you’re done. Tortellini take even longer than ravioli to make, and while the time difference is slight for small amounts, it sure can add up as you’re making more and more pasta.
2. Now you’ll want to make your pasta dough, a process I go into here. As with ravioli, you want to use a pasta roller (option 5(b) through that link) to make sheets of pasta that are soft and thin — soft enough that the dough will flex and seal once filled, and thin enough that it’ll cook through well. The second thinnest setting on the roller is generally a good idea. Just do one sheet at a time, and always, always, always wrap any dough you’re not currently working with in plastic wrap so it won’t dry out. If the dough’s even a little dry, it’ll split wide open when you try to fold up your tortellini.
3. Cut large circles out of your dough sheet using a glass cup or cookie cutter. (You can make square tortellini, or so the internet tells me, but I never have, so these instructions are for round.) Tuck the scraps away with the rest of the dough in plastic wrap, and cover up the circles you aren’t working with this very second with a towel so they won’t get more air on them than they have to.
4. Take a small amount of filling and put it in the middle of the circle. It’ll probably take a few tries to get the amount of filling right — you want as much as will fit, of course, but you also need enough dough that isn’t filled that you can fold up the tortellini. You certainly won’t use as much filling as you would to make ravioli or even a half-moon ravioli.
5. Now to fold up the dough. Three steps here. First, fold the circle in half, as you would to make a half-moon ravioli, and seal it up to form a semicircle. You don’t want any air in the pocket, just filling. (If there won’t be very much dough left at the edges if you line the half-moon up perfectly, just fall shy of lining the edges up a touch, like so.)
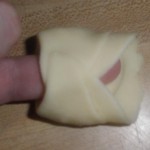
Second, flip the semicircle over (so that the flatter side that was facing down is facing you), and wrap the sides of the semicircle around the pinkie of your off-hand. The dough should now form a ring around your pinkie, with the rounded edge of the dough circle pointing upwards. Pinch together the two edges of the semicircle so that the ring seals together.
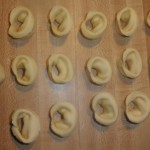
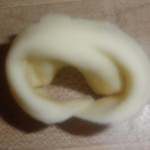
Third, stand the tortellini up on its flat bottom (the filling should make it fat enough to stay upright on its own) and fold down the curved top of the ring to make what I call the tortellini’s little hat. Then take the next circle, fill and seal it, lather rinse repeat.
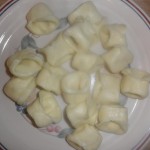
6. Once your tortellini are made and stuffed, you can either freeze or boil them; they need about 3 minutes to boil when they’re fresh, maybe 3 1/2, and longer when they’re frozen — about 5 minutes, maybe 6. You can eat them dry if you want, but they’re much better in a quick cream sauce!
 |
 |
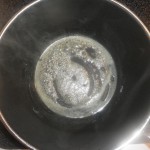
7. This sauce is very quick for just one serving, but still pretty fast in larger quantities. You need to give it constant attention, but it’s worth it! It’s easiest to make it in whatever pan you plan to toss the tortellini in; no real reason to dirty a little saucepan and move the sauce to another pan afterwards. Start with the tablespoon of butter by itself in the pan, and crank the burner up as high as it’ll go. Have the half-and-half and parmesan standing by, and a whisk in your hand!
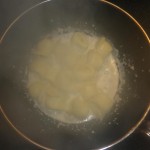
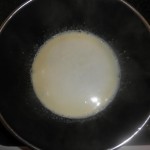
8. Stir the butter quickly as it melts so it won’t burn. Once it’s melted and starts to foam, add the half-and-half. The butter and half-and-half won’t particularly want to mix, so you’ll need to whisk the sauce almost constantly to keep it from breaking or burning.
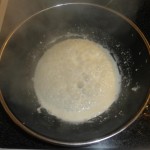
9. Once it starts to foam and increase in volume, it’s piping hot; toss in some parmesan, to taste. (You can add salt if you want/need — but usually the parmesan is salty enough on its own!) Keep whisking as the parmesan melts and is integrated into the sauce. Be careful not to let it over-reduce, or it’ll be too thick to spread over the pasta very well, and might burn.
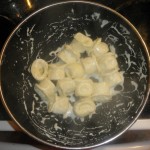
10. When the parmesan’s melted and the sauce is starting to reduce rapidly, take it off the heat, grab a soft spatula, and quickly toss the tortellini in the sauce. Just 30 seconds or so should coat the tortellini nicely. (And if you’re making a serving for one, and started the sauce when you put the tortellini in to boil, the sauce and the tortellini should be ready at about the same time!) Now it’s time to eat up while that filling and that sauce are still fresh and gooey!
 |
 |

Leave a Reply