


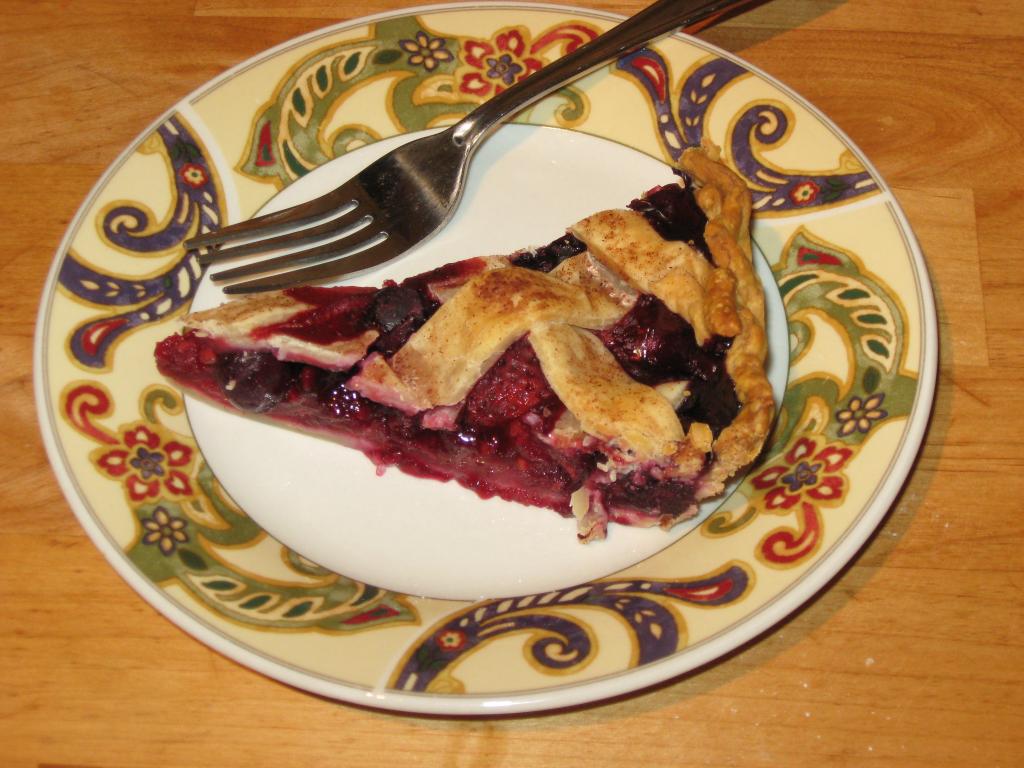
I decided I wanted more kinds of pie in my repertoire, so I consulted the contents of my kitchen and produced this pie. I suspect it would be good with blackberries in place of half of the raspberries, but as I was out of frozen blackberries, I don’t know :D. It is a one-hit wonder, which is nice. It’s always a good feeling to have an experiment turn out the first time. You can increase the sweetner if you like a sweeter pie, but I like my berries to have just a touch of a tart bite still, so I use the smaller measurement provided here. If you are a GF person you could make this filling and then put it in a GF crust and be good to go, I believe (though I haven’t checked for sure about the GF status of baking stevia, you could just use sugar and double the measurement). This was a big hit with my husband, as well, so you’ve got his vote of confidence too. There isn’t much else to say about this, so here you go!

Berry Pie
Ingredients:
- 2 cups whole frozen strawberries
- 1 1/2 cups whole frozen raspberries
- 1 1/2 cups whole frozen blueberries
- 1/4 cup cornstarch
- 2 – 4 TBS baking stevia, according to taste
- 1 TBS lemon juice
- 1/2 TBS Truvia (or nearly-identical off-brand; you need the sugar-like crystalline structure)
- 1/2 tsp ground cinnamon
- 2 9 inch pie crusts (with the top crust cut into strips, for the lattice)
Directions:
1. Combine frozen berries in a large mixing bowl. Combine cornstarch and baking stevia in a small bowl.
2. Grease your pie plate and press the bottom crust into it. Sprinkle 1 TBS of the cornstarch/baking stevia mix evenly over the bottom crust, spreading it as necessary. This layer will absorb extra juices and help keep your bottom crust from getting soggy. You can use a similar trick with flour/sugar mixes for pies like strawberry-rhubarb.
3. Sprinkle the frozen berries with the lemon juice. Add the remaining cornstarch mix and mix it all together until the berries are pretty evenly coated in the powders.
4. Dump the berry mixture into the pie crust. Lay the strips of top crust out and weave them into a lattice. I do this by laying out all of the vertical strips, then weaving the horizontal strips through them until I have a nice grid. Trim any ends that are way too long, but you do want a little bit to overlap the edge so you can pinch them down. Fold over and pinch the edge of the top crust (pinching in the ends of any lattice pieces that are laying over the side) so you have a nice pointy “pie crust” shape around the edges, just like you would if you’d used two whole crusts.
5. Mix together the Truvia and cinnamon. Sprinkle it over the top, concentrating along the pieces of latticework, but it’s fine if it gets on the filling too. If my lattice is a bit too dry and the sprinkle is just bouncing off I tap a little tiny bit of water along the pieces. You could also brush them in an egg glaze so they’ll cook up very brown and firm, but I didn’t this time around.
5. Bake in a preheated 375 degree Fahrenheit oven for 45 – 60 minutes, until the filling is bubbling and the crusts are browned. This pie is best if you let it cool completely because the filling will set up really nicely and give you a really pretty pie. If you cut into it while still warm the filling will ooze all over. Still tasty, but much messier, harder to eat, and more likely to result in a soggy bottom crust the next day (if you let it cool it stays firm at least through day two; can’t tell you more, since we’d eaten all the pie by day three!). Enjoy!


Leave a Reply