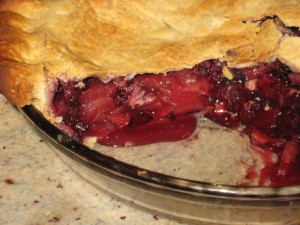
Hey there, I’m back! The trip was good and all that, now let’s talk about pie :D. Around here, apple season and blackberry season overlap, and I couldn’t help but think “I wonder if apple and blackberry pie would be any good?” Well, we tried it and can conclusively say yes, yes it is! To get the pie innards adequately baked, though, you’re going to need some kind of pie crust shield to keep the edges from burning. You can pull the pie out and crimp tinfoil onto the edge crust (this is the way I used to do it growing up), but I’ve since discovered this pie crust shield which is WAY easier. Just pop it on when you need it, pull it off when you’re done. It’s a great thing to have around, and it’s cheap and small and easy to store too! What more could you ask for?
This pie is really great with freshly whipped cream on top. I suspect it would be really good with vanilla ice cream, too, but we haven’t tried that yet. Oh, and if you put this filling in a GF Pie Crust it would be a great natural-sugar GF dessert, too, since Truvia is celiac-safe (seriously, Jennifer has eaten it several times now with no problems). Without further ado, pie!
Blackberry Apple Pie
Ingredients
- 2 9 inch pie crusts, store-bought or homemade
- 4 cups peeled and sliced apples (5 or 6–Granny Smith work, so do Jonathans or Braeburn, though I’d mix either of the latter two with at least a couple Granny Smiths)
- 2 cups fresh blackberries, rinsed and drained
- 3 TBS Truvia
- 4 1/2 tsp cornstarch
- 1/2 tsp ground cinnamon
- 1/4 tsp ground nutmeg
- 1/2 TBS cold butter
Directions
1. Preheat the oven to 375 degrees F. Press your bottom crust into a 9″ deep dish pie plate, preferably a glass one.
2. In a large mixing bowl, combine the apples and blackberries and mix gently to distribute. In a small bowl combine the Truvia, cornstarch, cinnamon and nutmeg. Take one tablespoon of this dry mixture and sprinkle it across your bottom crust. This will soak up juices and help keep your bottom crust from getting soggy.
3. Put the remaining dry mixture in with the fruit and stir gently to coat (you’re trying not to pulverize your blackberries, though a certain amount of breakage is expected).
4. Pour the filling into the prepared pie crust and then dot the cold butter across the top of the fruit (this means cut it into tiny pieces and evenly distribute them across the top). Cover all this with the top crust and pinch the edges to seal them.
5. Put the pie in the preheated oven and bake 45 to 50 minutes. When the edge crust is looking golden brown (usually about half way through), cover it with the pie crust shield. Remove pie from the oven when it is bubbly and fragrant. Let cool before serving (you really should with this one, it serves much better that way). Top with whipped cream (never cool whip!) or ice cream and enjoy!


Leave a Reply