There’s a lot of goodies in the world I never had any strong yearning for, back when I could eat whatever I liked, that were still good to have every once in a while. After all, you never really know what you have till it’s gone, right? Well, if you liked Oreos — or, as it were, chocolate cookie sandwiches with creamy filling — have them back. 😀
There’s two big things worthy of the spotlight in this recipe: Dutch process cocoa powder, which is deliciously strong and dark, and totally worth getting for the right recipe (it just isn’t the same without it), and my adjustable rolling pin. This thing is just superb. I can fix the rolling pin to my choice of 1/8″, 1/4″, or 3/8″ above the rolling surface, so I don’t have to worry about any thick spots when I roll out dough, and it always comes out even. So much easier. I’ve used it to make pie crusts, biscuits, cheese crackers, you name it.
Even if you don’t care much about “oreos,” you could do interesting things with crumbs from these cookies (and I intend to) — like a cookie crumb pie crust, or topping for a sundae. I mean, hard chocolate cookies. What can’t you do? 🙂
“Oreo” Cookie Sandwiches
Yield: 16-24 cookies (8-12 sandwiches), depending how big you make them
Ingredients:
For the cookies:
- 2/3 cup Dutch-process cocoa powder (or just regular cocoa powder, if you don’t like the stronger chocolate taste)
- 3/4 cup dough mix
- 1/4 tsp xanthan gum
- 1/8 tsp guar gum
- 1/8 tsp salt
- 1/2 cup softened butter
- 1 cup sugar
- 1 egg
- 1/2 tsp vanilla
For the filling:
- 1/2 cup softened butter
- 1 cup powdered sugar
- 1/2 tsp vanilla
- milk, if you want a very liquid filling (optional)
Directions:
1. Preheat the oven to 325 degrees Farenheit. Lightly grease a large cookie sheet, and set aside.
2. In the bowl of a stand mixer, using the paddle attachment, combine all the ingredients for the cookie dough. (It speeds the process up a little if you cream the butter a little first, but if you forget to, oh well.) 🙂 Run the mixer on a lower speed at first, so the ingredients can start combining without kicking powders up into the air, but once everything’s dampened turn up the speed and be patient. Resist the temptation to add any water or other liquids to help the dough come together; just wait, and it’ll come together very nicely on its own.
 |
 |
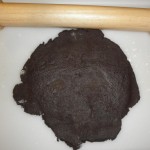
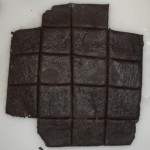
3. Lightly dust your rolling pin and rolling surface with dough mix, then roll the dough out 1/4″ thick and cut it into squares 1-2″ on a side. (Or cut out circles, if you want, with a cookie cutter.)
 |
 |
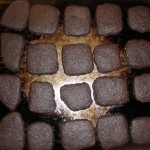
4. Gently separate the squares and spread them out on a large cookie sheet, at least an inch apart. (The dough should be quite well behaved and hold together just fine, but be a touch ginger with it just to be on the safe side.) Bake in preheated oven 18-20 minutes.
 |
 |
5. Let the cookies cool completely before you even try to get them off the pan, or they’ll break. (I like to put the cookie sheet on a cooling rack to help it cool down faster.) Wait at least fifteen minutes before you even try; the cookies will be soft to the touch when freshly baked, but hard and crisp once they’re cool.
While the cookies cool, whip up the filling: Wash out your stand mixer bowl real quick, and use the whisk attachment to whip together all the filling ingredients (butter, powdered sugar, and vanilla). Again, be patient; the longer you mix the filling, the creamier and fluffier it’ll get. You can add a little milk if you to make it smoother and more liquid, but you don’t need it to make a spreadable filling come together.
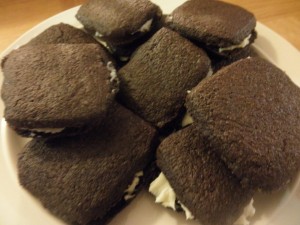
6. Now all you need to do is spread the filling on every other cookie, and press them together in pairs to form tasty, tasty cookie sandwiches. 🙂 You can serve them as is, or refrigerate them to get the filling cold if you like. Enjoy!


Leave a Reply