


I presented versions of several desserts in progress at our Easter feast — this one was definitely a hit. If you really, really like bitter dark chocolate, you can use cocoa powder straight up; for a sweeter-tasting version with a brighter taste, you can use some carob powder, too.
We’ve posted mousse recipes before, of course; you can find Jocelyn’s comments on the raw egg white used in this recipe here. This version of chocolate mousse really only differs from that one in two ways: One, it uses cocoa (and carob!) powder instead of baking chocolate, which means you don’t have to worry about avoiding soy or other stabilizers found in most baking chocolate, and you don’t have to ever touch the stove while you’re whipping up the mousse to set. (Which I love, because adding the melted chocolate was always the part I managed to screw up, and I’d always have to whip a new egg white, and who wants to do that.) Two, it uses liquid stevia extract instead of agave nectar as a sweetener, so if you can’t tolerate agave nectar, you’re good to go.
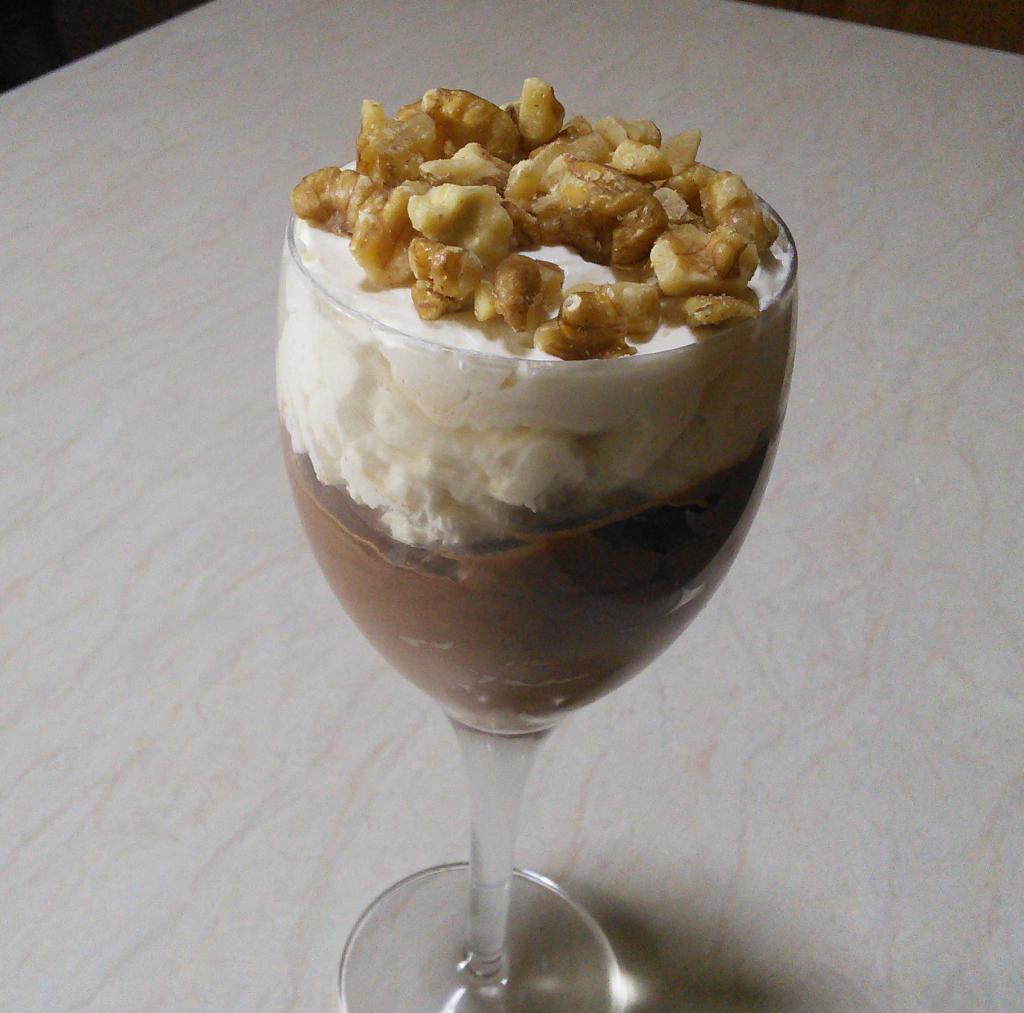
The mousse in the picture is topped with whipped cream and walnuts, but you could top it any number of ways — chocolate shavings, cherries, raspberries, maybe nothing at all. 🙂 I’ve included my whipped cream recipe at the bottom of this post in case you want to make that up sugar-free, too.
Man, now I’m craving mousse. 🙂
Sugar-Free Mousse
Yield: About 4 servings
Ingredients:
- 1 cup heavy whipping cream
- 2 egg whites
- 1 tsp vanilla
- 1/8 tsp salt
- 1/2 tsp liquid stevia extract
- 1/4 cup cocoa powder for a strong dark chocolate taste, or 3 T cocoa powder and 1 T carob powder for a sweeter, brighter chocolate taste
Directions:
1. In the bowl of a stand mixer, using the whisk attachment, whip together the heavy cream, vanilla, salt, liquid stevia, and cocoa powder (plus the carob powder if you’re using that). Beat until stiff peaks form — this happens very quickly at top speed, less than a minute.
2. In another bowl (or the same bowl, cleaned out, setting aside the cream mixture), using a whisk attachment, beat the egg whites until stiff peaks form. This takes several minutes.
3. Combine the eggs and cream mixture, and whip together until fully combined, either by hand or with the mixer.
4. Spoon out the combined mixture into the individual serving containers you plan to use. I use wine glasses, but really anything works — bowls, mugs, whatever you have handy. 🙂 Cover with plastic wrap and put in the fridge to set for several hours. Once the mousse is set, you can either top it with whatever you like, or just serve it as is! It keeps in the fridge for several days, so you can make it pretty far in advance of serving it. Enjoy! 🙂
And now, my whipped cream recipe, first seen in my post on grain-free waffles:
Yield: Eyeballing it, probably 2 – 3 cups
Ingredients:
- 1 1/4 cup heavy whipping cream
- 1/2 tsp vanilla
- 1/8 tsp liquid stevia extract
Directions:
1. In the bowl of a stand mixer, combine all ingredients. Whip using the whisk attachment, starting at a low speed, then increasing the speed slowly up to maximum so you don’t splash yourself! Whip until soft peaks form (this takes a couple minutes at most), then spoon the whipped cream into a tupperware to store in the fridge.
I don’t think I’ve had a batch last longer than a week, but it keeps that long with no problems — though you can always freeze whipped cream until later if you’re worried!


Leave a Reply